Bite-sized Godot: Better screen shake
Screen shake can have a big impact on your game’s feel, adding intensity and weight to what’s on screen. A common technique for screen shake is to just use a random camera offset each frame for violent shakes, but today we’ll look at how you can use Godot’s built-in noise class to create a better, smoother shake.
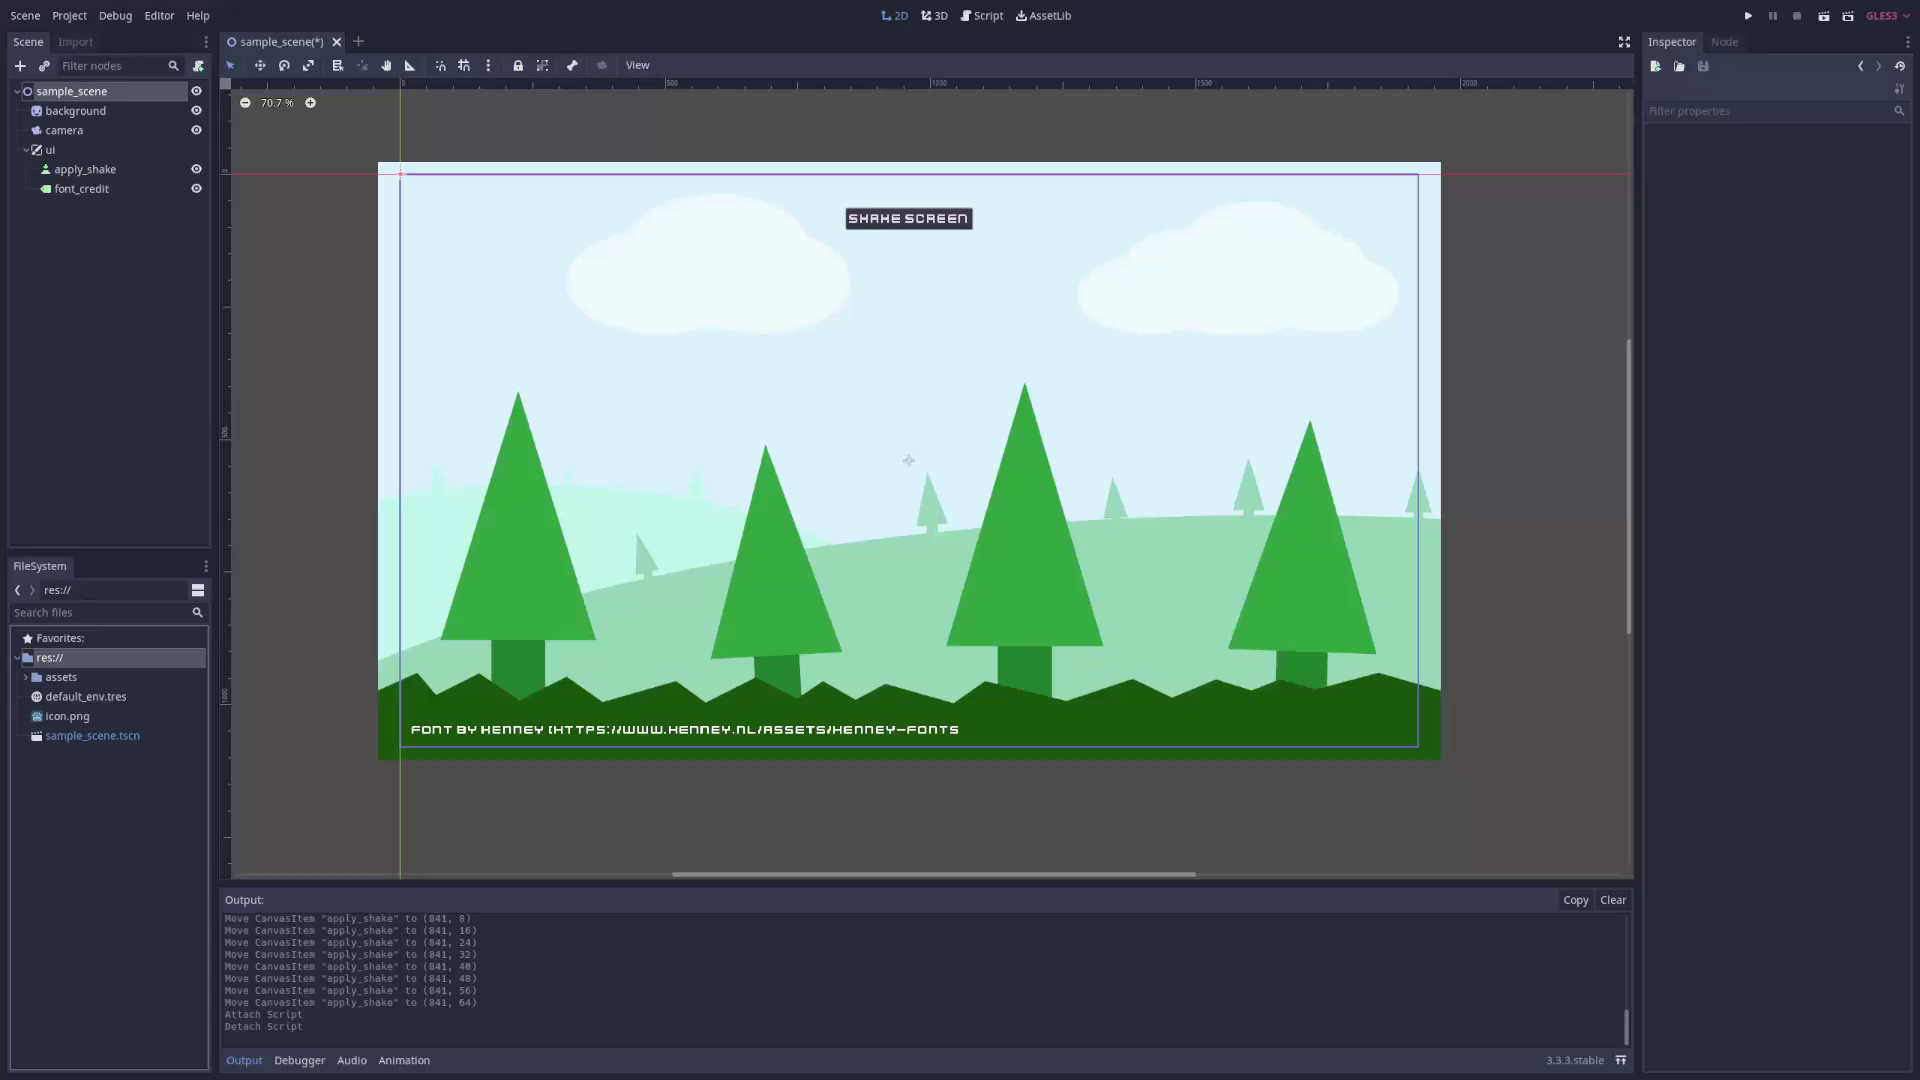
Here’s the scene we’ll be working with. Nothing fancy, just a background so we can see the effects of our shaking and a button so we can choose when to apply the effect. Also note that I’ve blown up the background slightly so that we have a bit of an artwork buffer for the shaking camera.

The basic way to shake
The most basic way to shake the camera is to apply a random offset to its position each frame. This works pretty well for very violent shakes, but it can also break the connection between the camera and the game since the camera can move anywhere within the random offset range instantaneously, resulting in more jarring and unrealistic movement. Here’s one way you could code this type of shake, using linear interpolation to gradually fade out the effect:
extends Node2D

# The starting range of possible offsets using random values
export var RANDOM_SHAKE_STRENGTH: float = 30.0
# Multiplier for lerping the shake strength to zero
export var SHAKE_DECAY_RATE: float = 5.0

onready var camera = $camera
onready var rand = RandomNumberGenerator.new()
onready var apply_button = $ui/apply_shake

var shake_strength: float = 0.0

func _ready() -> void:
    rand.randomize()
    apply_button.connect("pressed", self, "apply_shake")

func apply_shake() -> void:
	shake_strength = RANDOM_SHAKE_STRENGTH

func _process(delta: float) -> void:
    # Fade out the intensity over time
    shake_strength = lerp(shake_strength, 0, SHAKE_DECAY_RATE * delta)

    # Shake by adjusting camera.offset so we can move the camera around the level via it's position
    camera.offset = get_random_offset()

func get_random_offset() -> Vector2:
	return Vector2(
		rand.randf_range(-shake_strength, shake_strength),
		rand.randf_range(-shake_strength, shake_strength)
	)
Using noise
So now let’s look at using noise to control our shake, which has a couple of benefits:
- Movement is fluid and therefore less jarring
- We have the option to loop the noise in case we want a constant movement path
- We can play with the speed and strength to get everything from intense shakes to gentle sways
Godot comes with a built-in noise implementation via its OpenSimplexNoise class, so this is pretty straightforward. All we have to do is initialize the noise in our _ready() function and then read from this generated noise each frame to get the offset value, keeping track of where we are each frame (via noise_i) so that we can smoothly traverse the generated noise.
The main properties you’ll probably care about on the noise are the period, which affects how quickly the noise changes value, the seed, which is used to generate the random noise (you can a constant seed, for instance, to always get the same noise), and the octaves, which I didn’t set here but can be adjusted to add additional detail to the noise.
To read the noise out, we can request data along one to four dimensions. Two dimensions makes sense in this case since that’s enough to get different values along the x and y axes. I usually use the same noise_i for one parameter and then just pick some other numbers fairly far apart for the other parameter.
extends Node2D

# How quickly to move through the noise
export var NOISE_SHAKE_SPEED: float = 30.0
# Noise returns values in the range (-1, 1)
# So this is how much to multiply the returned value by
export var NOISE_SHAKE_STRENGTH: float = 60.0
# Multiplier for lerping the shake strength to zero
export var SHAKE_DECAY_RATE: float = 5.0

onready var camera = $camera
onready var rand = RandomNumberGenerator.new()
onready var noise = OpenSimplexNoise.new()
onready var apply_button = $ui/apply_shake

# Used to keep track of where we are in the noise
# so that we can smoothly move through it
var noise_i: float = 0.0

var shake_strength: float = 0.0

func _ready() -> void:
    rand.randomize()
    # Randomize the generated noise
    noise.seed = rand.randi()
    # Period affects how quickly the noise changes values
    noise.period = 2

    apply_button.connect("pressed", self, "apply_shake")

func apply_noise_shake() -> void:
    shake_strength = NOISE_SHAKE_STRENGTH

func _process(delta: float) -> void:
    # Fade out the intensity over time
    shake_strength = lerp(shake_strength, 0, SHAKE_DECAY_RATE * delta)

    # Shake by adjusting camera.offset so we can move the camera around the level via it's position
    camera.offset = get_noise_offset(delta)

func get_noise_offset(delta: float) -> Vector2:
	noise_i += delta * NOISE_SHAKE_SPEED
	# Set the x values of each call to 'get_noise_2d' to a different value
	# so that our x and y vectors will be reading from unrelated areas of noise
	return Vector2(
		noise.get_noise_2d(1, noise_i) * shake_strength,
		noise.get_noise_2d(100, noise_i) * shake_strength
	)
By playing with the exported values, we can get everything from a violent shake to a gentle, handheld camera effect. The defaults should provide a fairly good (if perhaps a bit intense) starting point for screen shake, and by setting SHAKE_DECAY_RATE to zero and lowering NOISE_SHAKE_SPEED and NOISE_SHAKE_STRENGTH significantly (1 and 8, respectively, looked decent to me) we can create a subtle sense of motion on the screen, especially if paired with some parallax artwork.
Conclusion
And that’s how you can use noise to create better and more flexible screen shake in Godot. Check out the sample project to see a comparison of these techniques in action, and be sure to check out the OpenSimplexNoise documentation to get a better idea of all the parameters you can adjust and methods you can call.