An introduction to graph rewriting for procedural content generation
Graph rewriting is a pretty popular area of study for procedural content generation in games because it allows for a high level of flexibility and customization beyond what other simpler, more common techniques offer. The concept is so flexible, in fact, that just in the gamedev space it’s been used to generate level maps, quest structures, building geometries, and more. This technique, and variations on it, has been used in games such as Unexplored, Lenna’s Inception, and Enter the Gungeon.
As opposed to some of the other procedural concept generation techniques I’ve talked about thus far, there are even tools you can download and use to help you design and test your graph rewriting system. So in this post, we’ll look at what graph rewriting is and how to use it to generate procedural content. But first, just in case you’re unfamiliar with the concept of graphs or maybe need a short refresher, let’s do a quick review of the data structure behind it all.
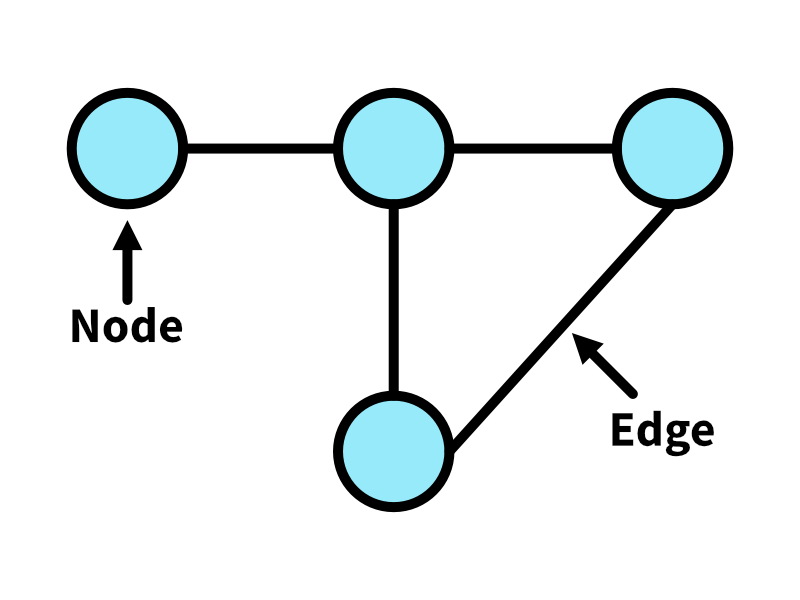
Nodes and edges
A graph is a data structure that consists of two types of components: nodes (sometimes called vertices) and edges, which are used to connect nodes to one another. If that sounds pretty generic, well, it is. There’s a large number of classifications a graph can fall into based on its structure, specialized algorithms for dealing with certain types of graphs (such as trees), and multiple ways of representing the data, but we’re not really interested in most of that today, and all we care about for this intro section is the concept of nodes and edges. Nodes can be connected to as many or as few other nodes as we want, and even connected to themselves if desired. Edges can have a directional component to them (ie this connection only flows one way) or can be non or bi-directional. For today’s discussion, we’ll also assume all graphs discussed are connected graphs, meaning that there are no “gaps” in the graph and that every node can be reached by every other node by traversing some set of edges.
Graphs are used in a lot of different applications. On social media, users can be represented as nodes and followers represented by the directional edges between users, thereby showing who follows who. In pathfinding algorithms, nodes can be the potential waypoints you’ll travel through, with edges representing which waypoints are connected to which. Even a state machine diagram is really just a graph with directional edges to show the direction of flow.
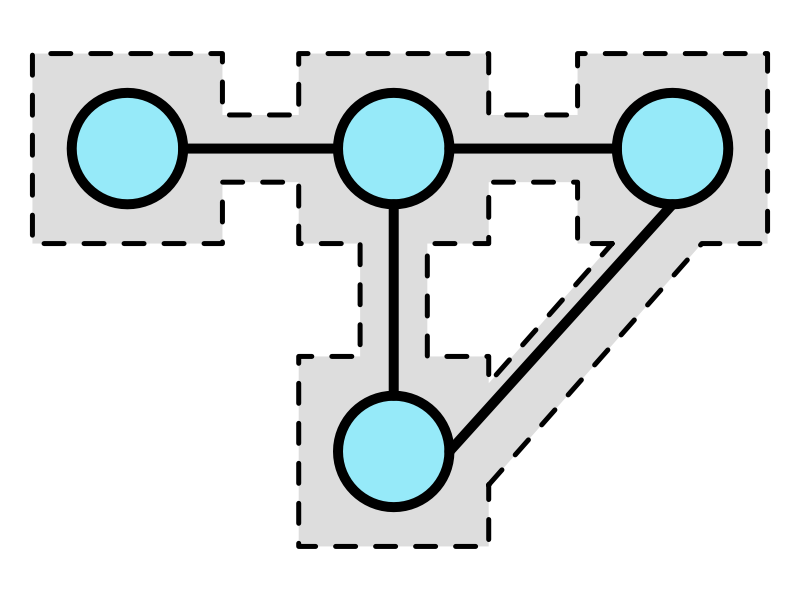
That last image is a big deal for gamedev. If we represent each area of a level as a node and use edges to denote which areas connect to which, we now have our level represented in a very algorithm-friendly way for further processing. Snap everything to a grid, throw in a few constraints to prevent any wonkiness, and you’ve even got yourself a grid-based dungeon layout ready to be thrown into a tilemap!
But it’s not really that interesting to just show you a data structure that can represent a level. We need to do something with it to make it worthwhile, and that’s where graph rewriting comes in.
Graph rewriting
With graph rewriting, we generate a starting graph and then process it according to the rules we define to rewrite parts of the graph, typically iterating over the graph continually in case one rewrite triggers the rules of another until some condition is met or there’s nothing left to rewrite. If you’ve read my post on generative grammars, this should sound very familiar to you as it’s the exact same technique we discussed then, just being used with a different data structure.
The rules for rewriting can be whatever we define: swap one node for one or more nodes, replace an entire subgraph, delete nodes, or even just shift things around. We’ll simply code up our algorithm to look for the pattern and then process it accordingly once found. Since I think visuals can explain a lot here, let’s look at a number of examples of what rewriting can look like:
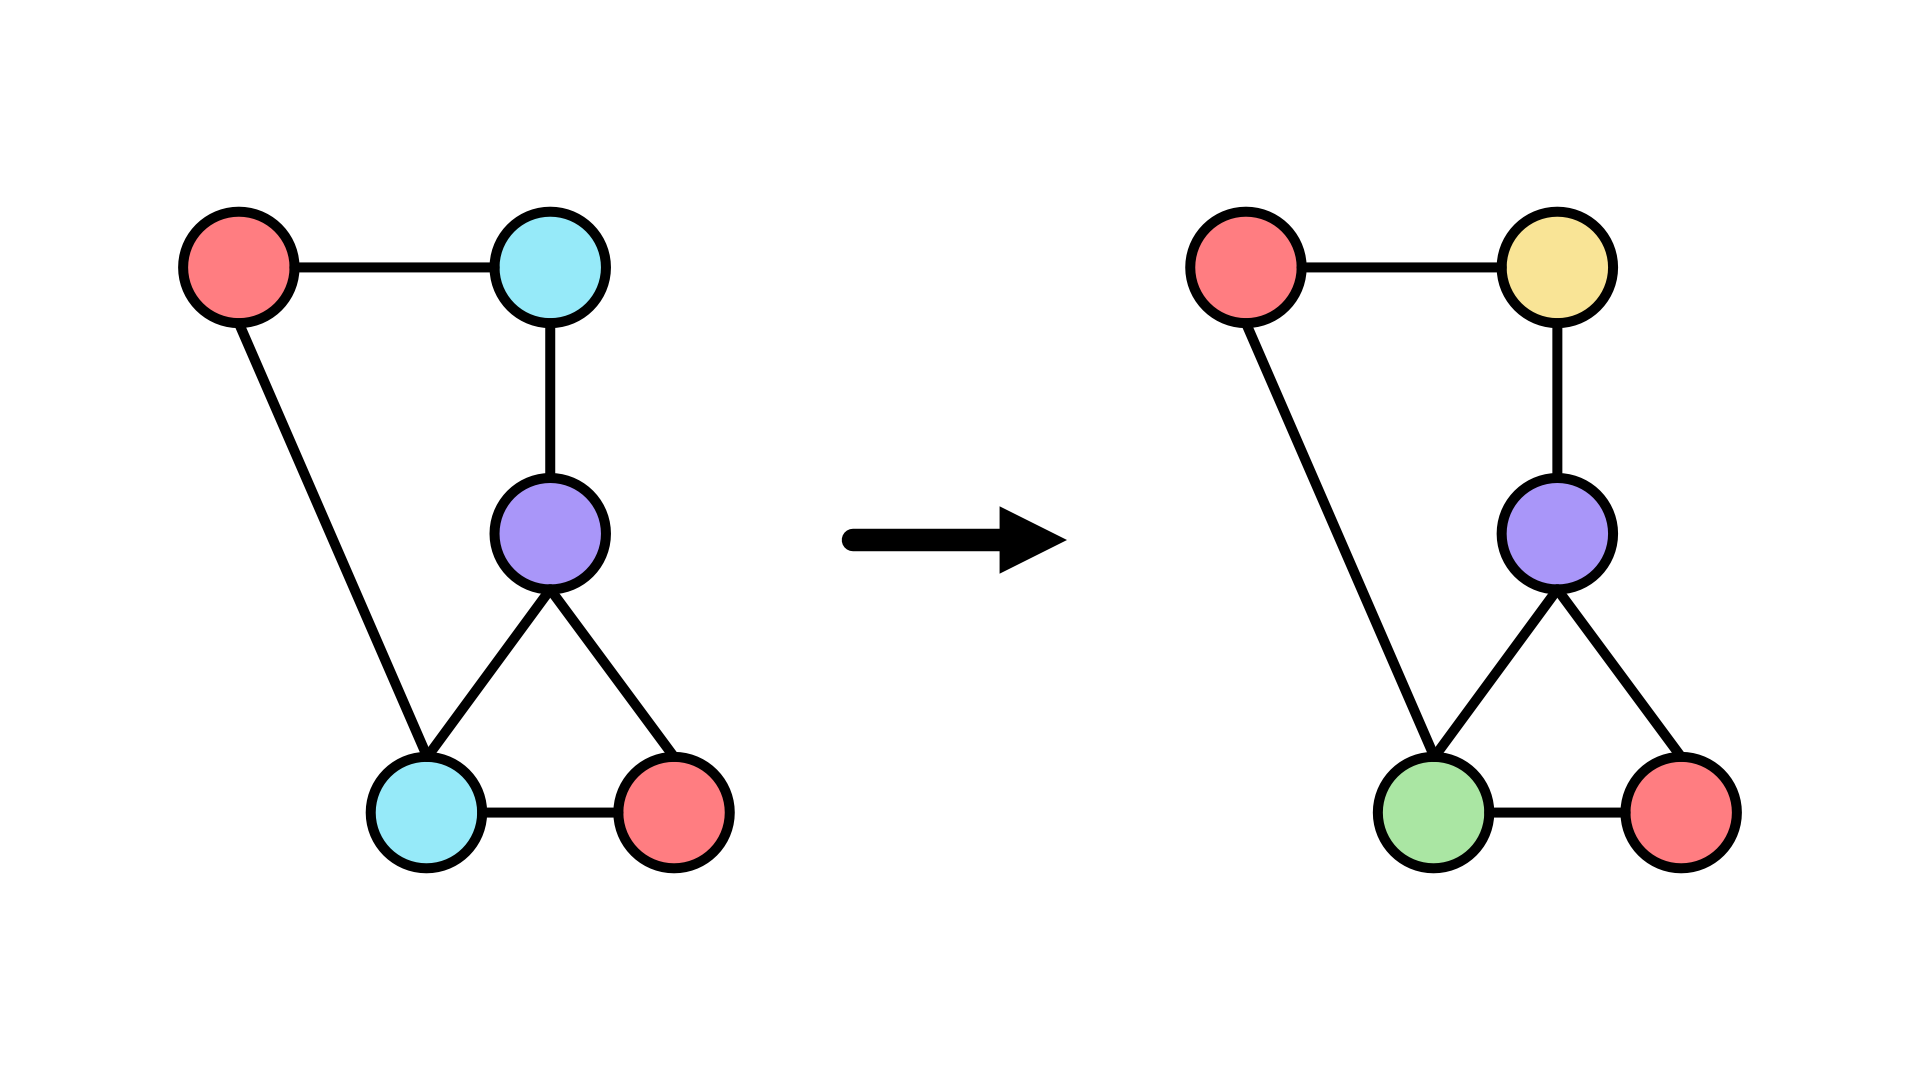
Example 1
Replace all blue nodes with either green or yellow nodes.
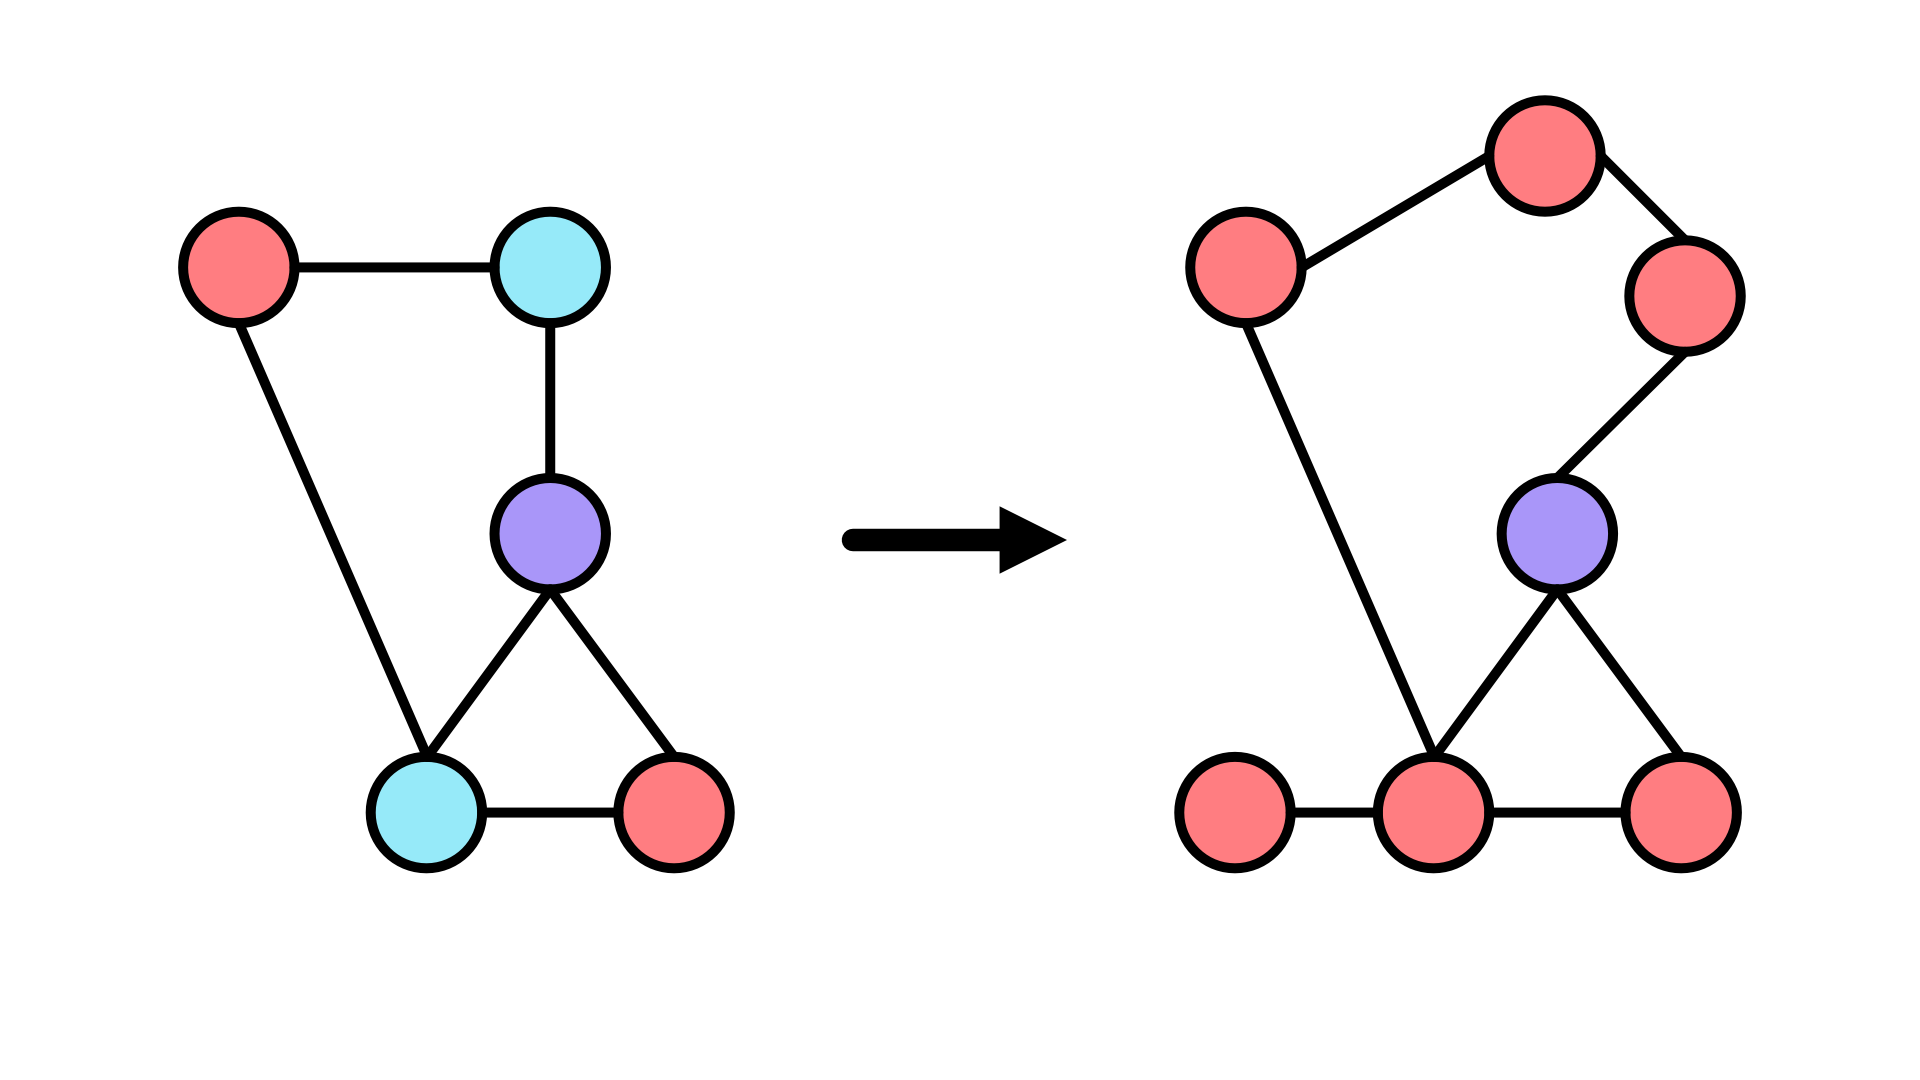
Example 2
Replace all blue nodes with two red nodes randomly connected into the original graph.
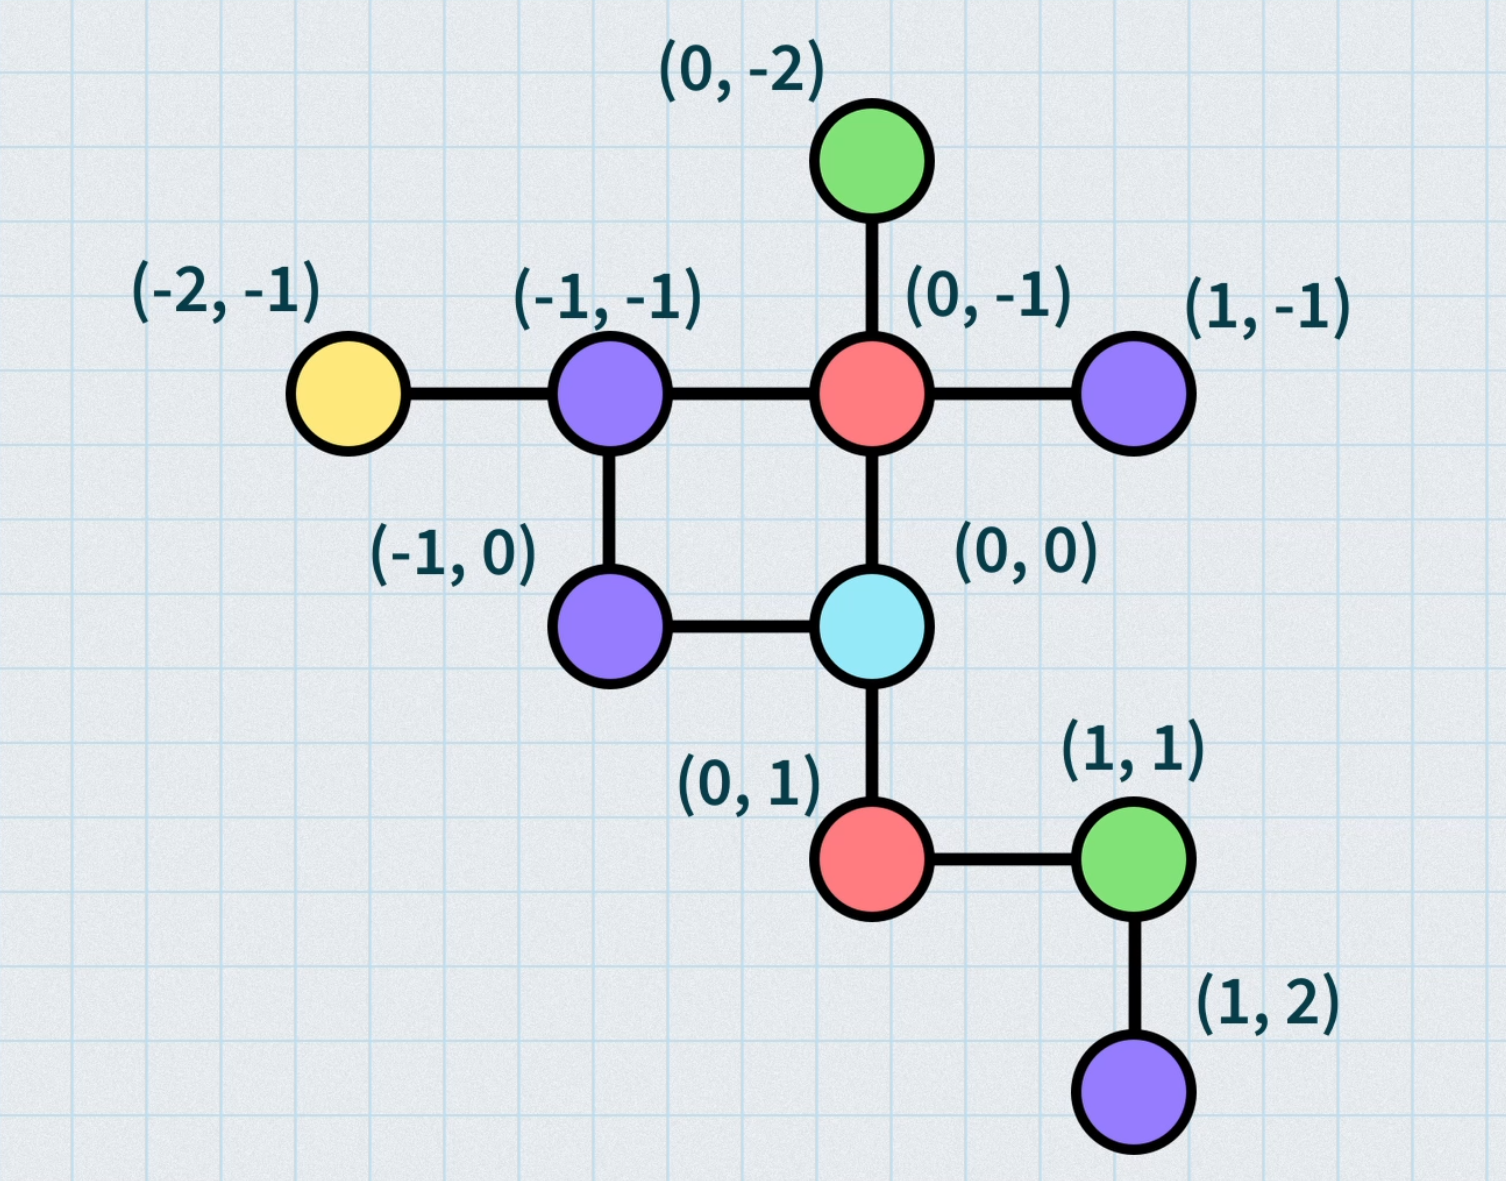
Example 3
Use the following rules for replacement.
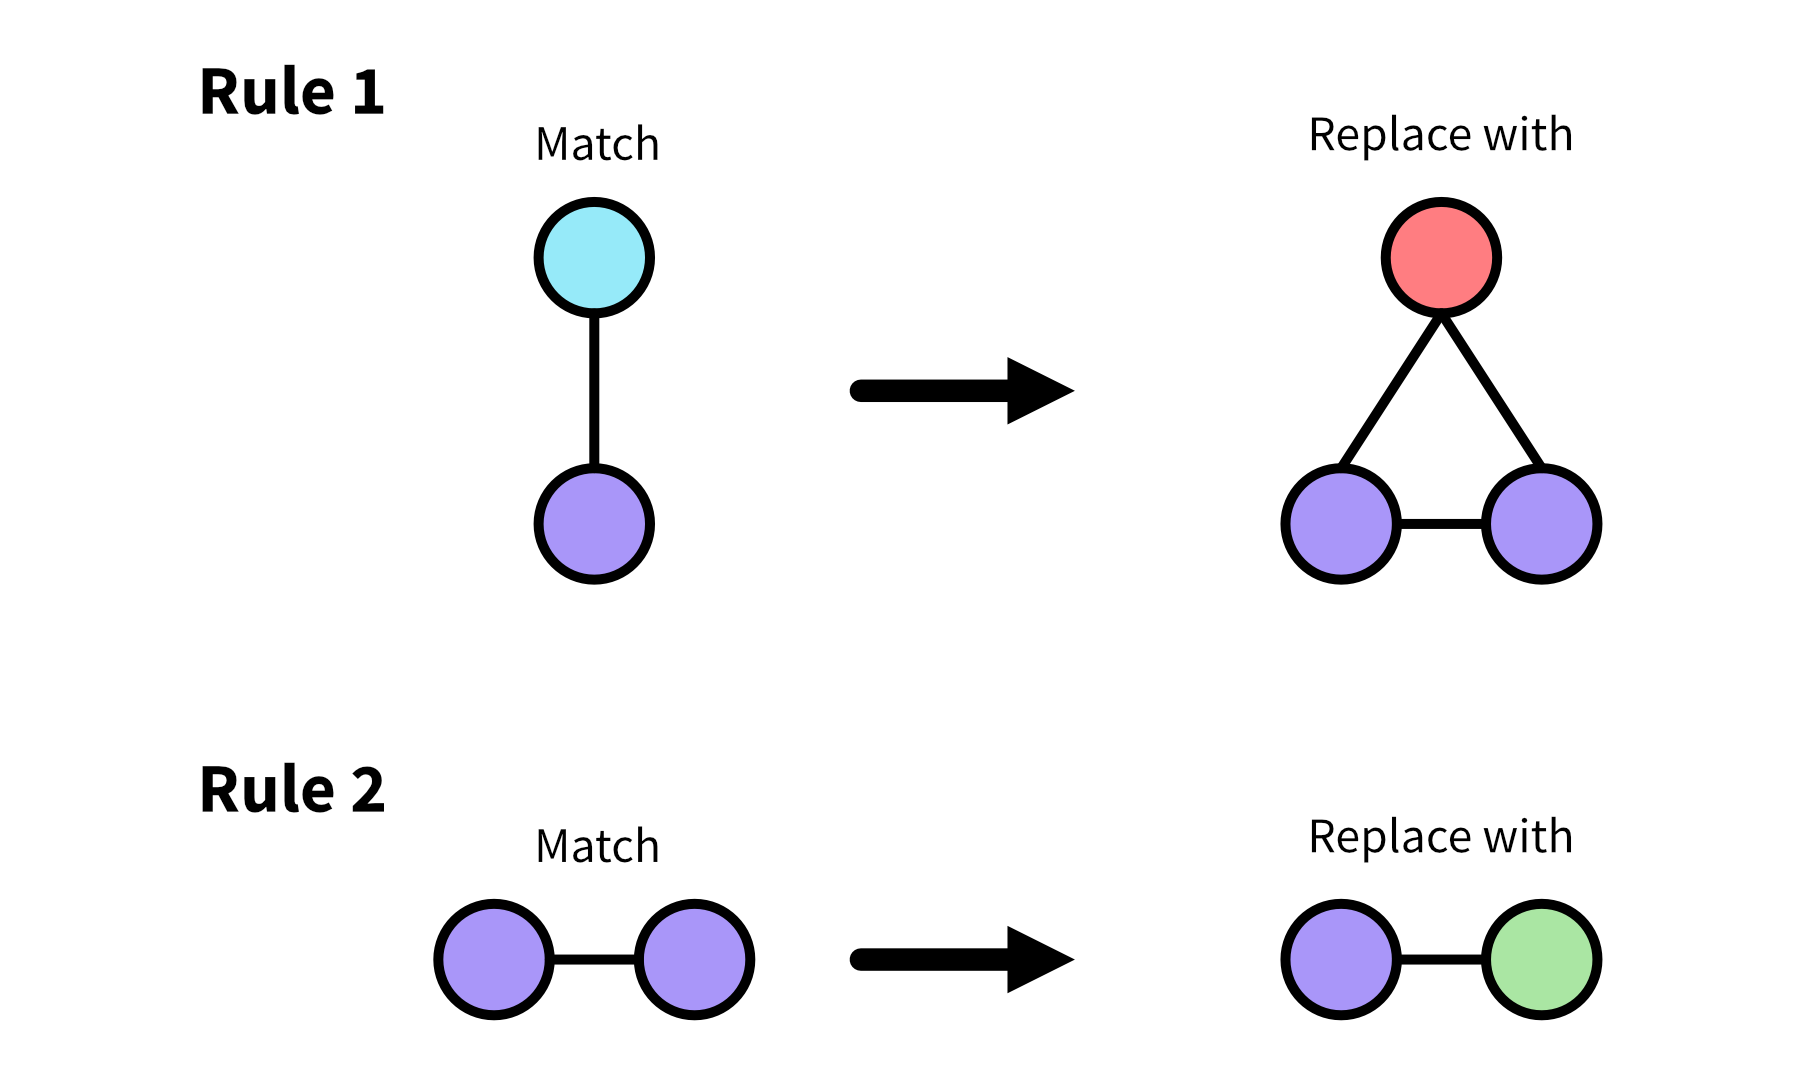
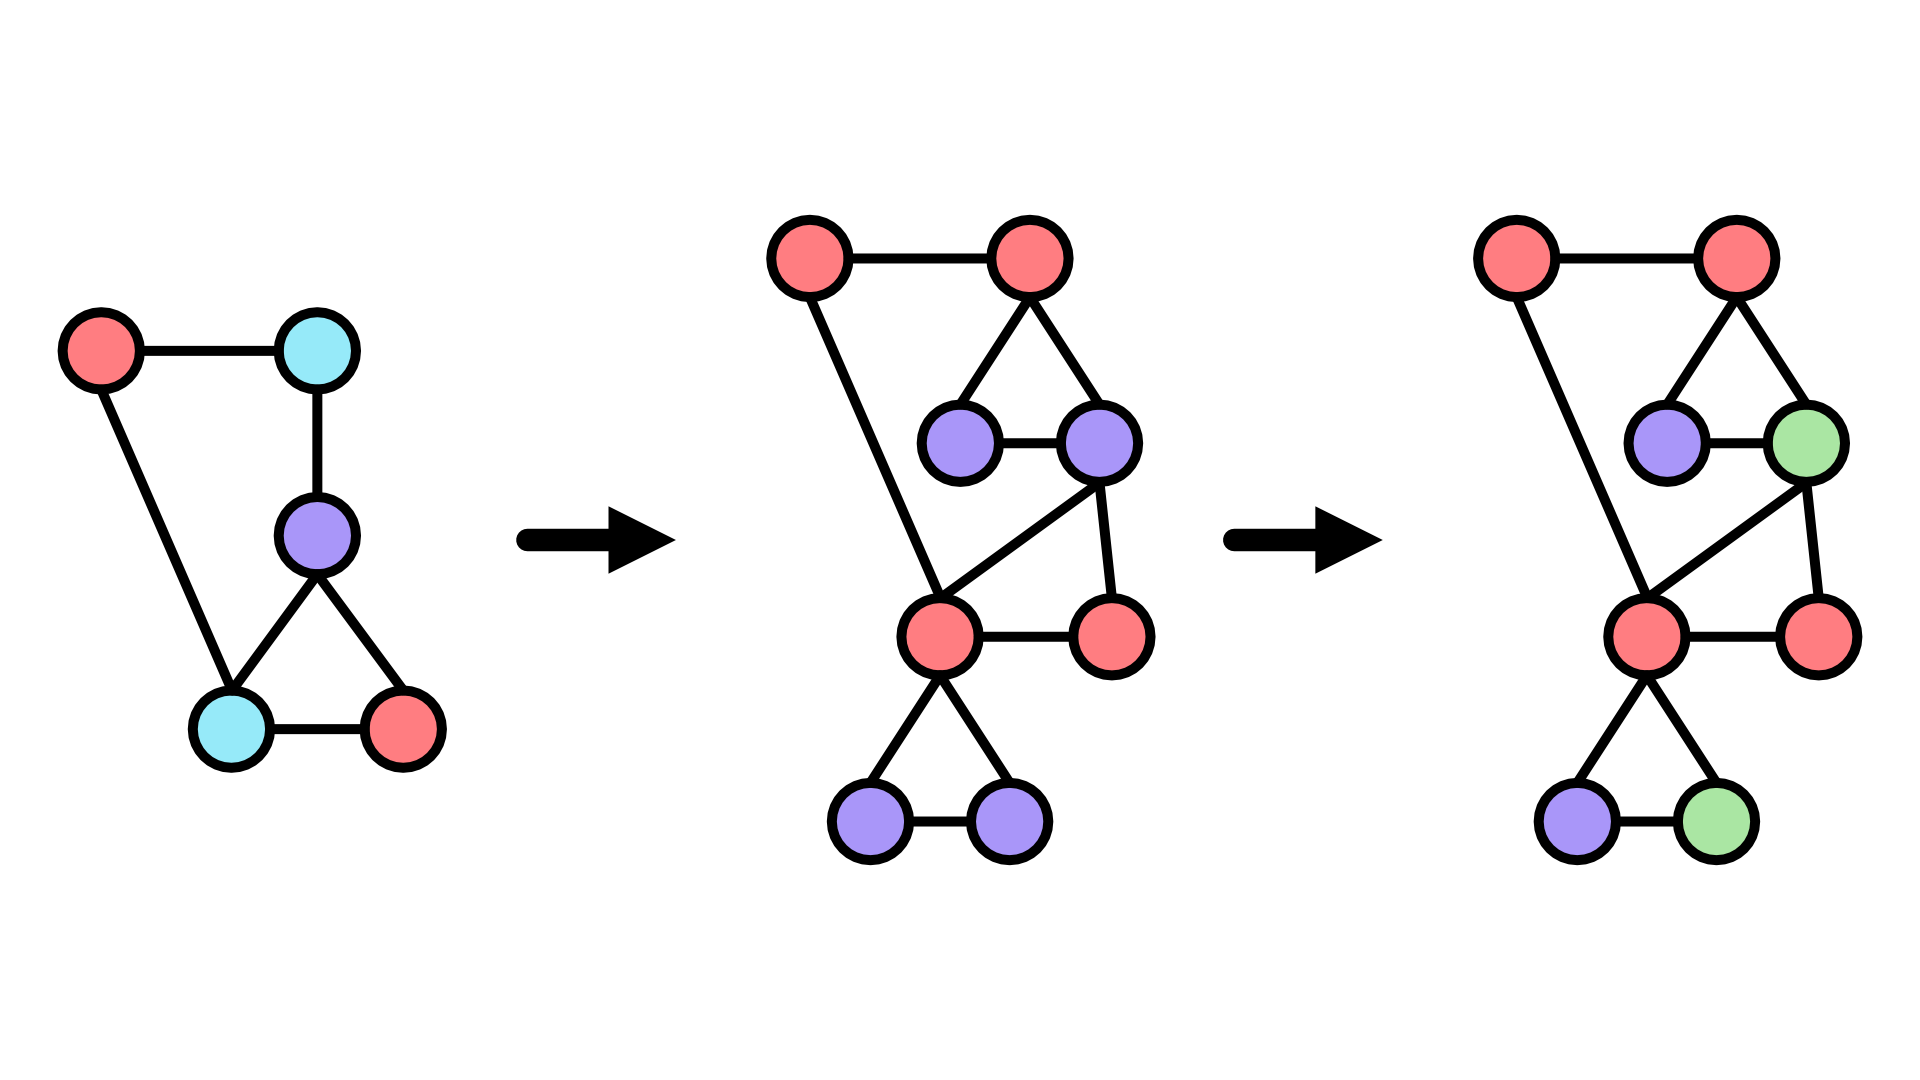
Using these rules and the same example graph, we’ll first swap the connected blue and purple nodes for the triangular structure, which will then match the pattern of two purple nodes connected to one another, so we’ll need to do another rewrite. Note that the connections in this case have been arbitrarily placed, but you’d also want to specify in the rule where external connections should end up after the rewrite if that’s important for your purposes.
Example 4
Use the following rule for replacement.
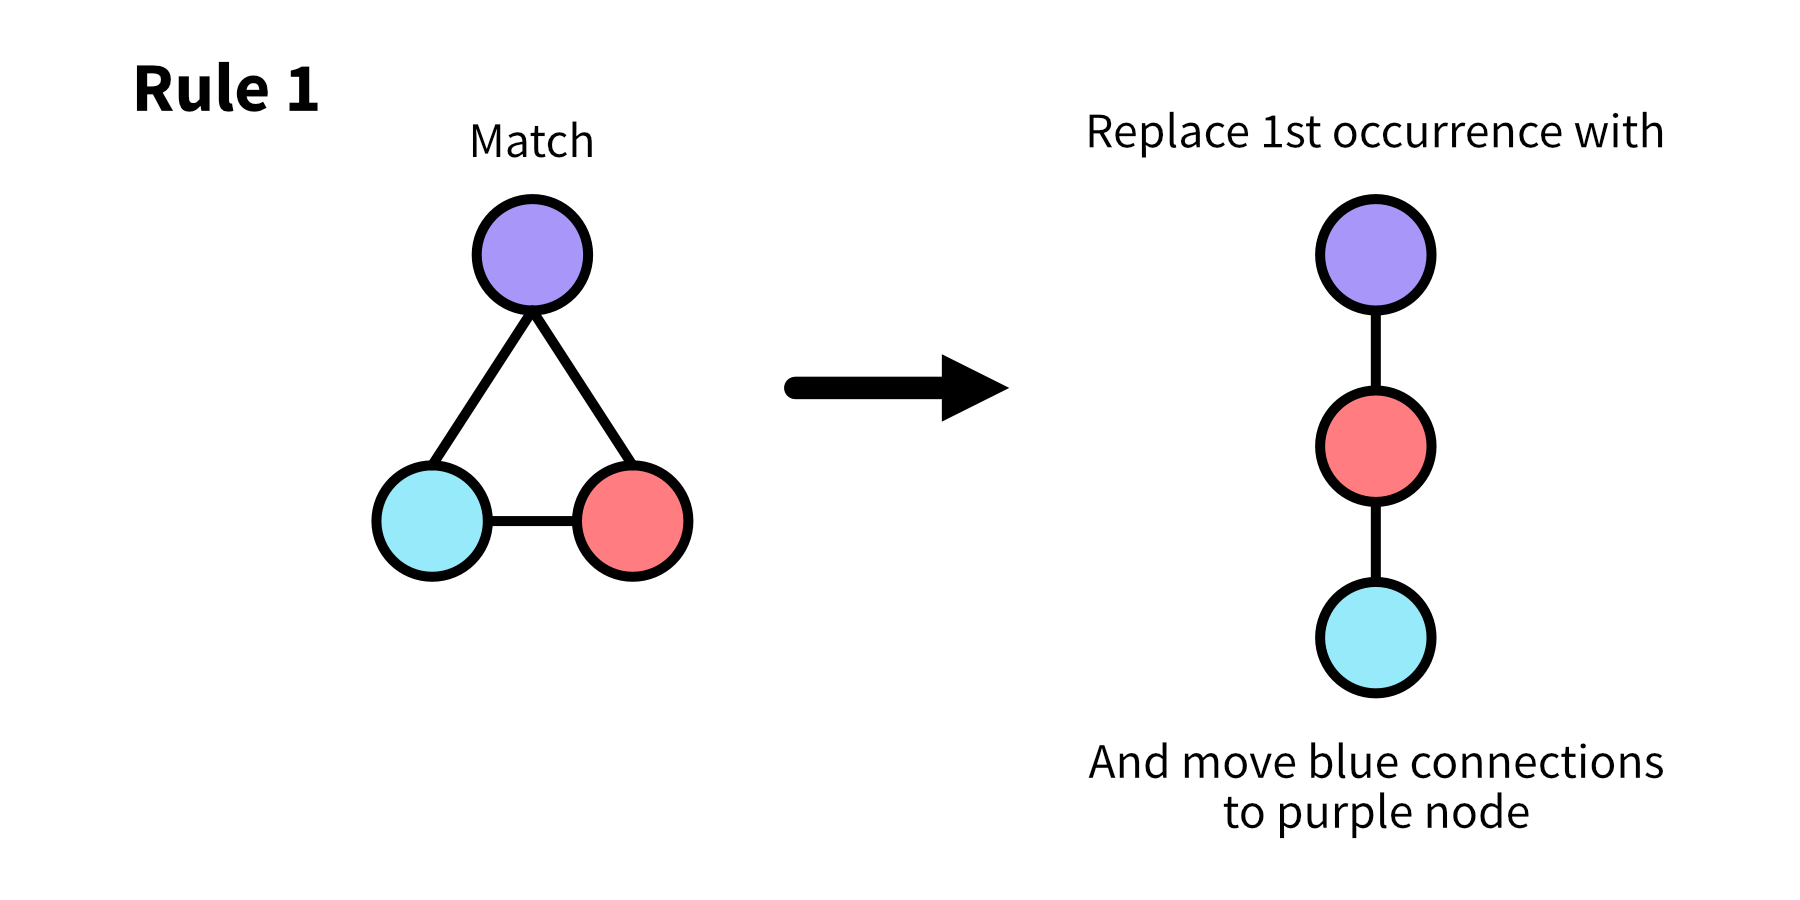
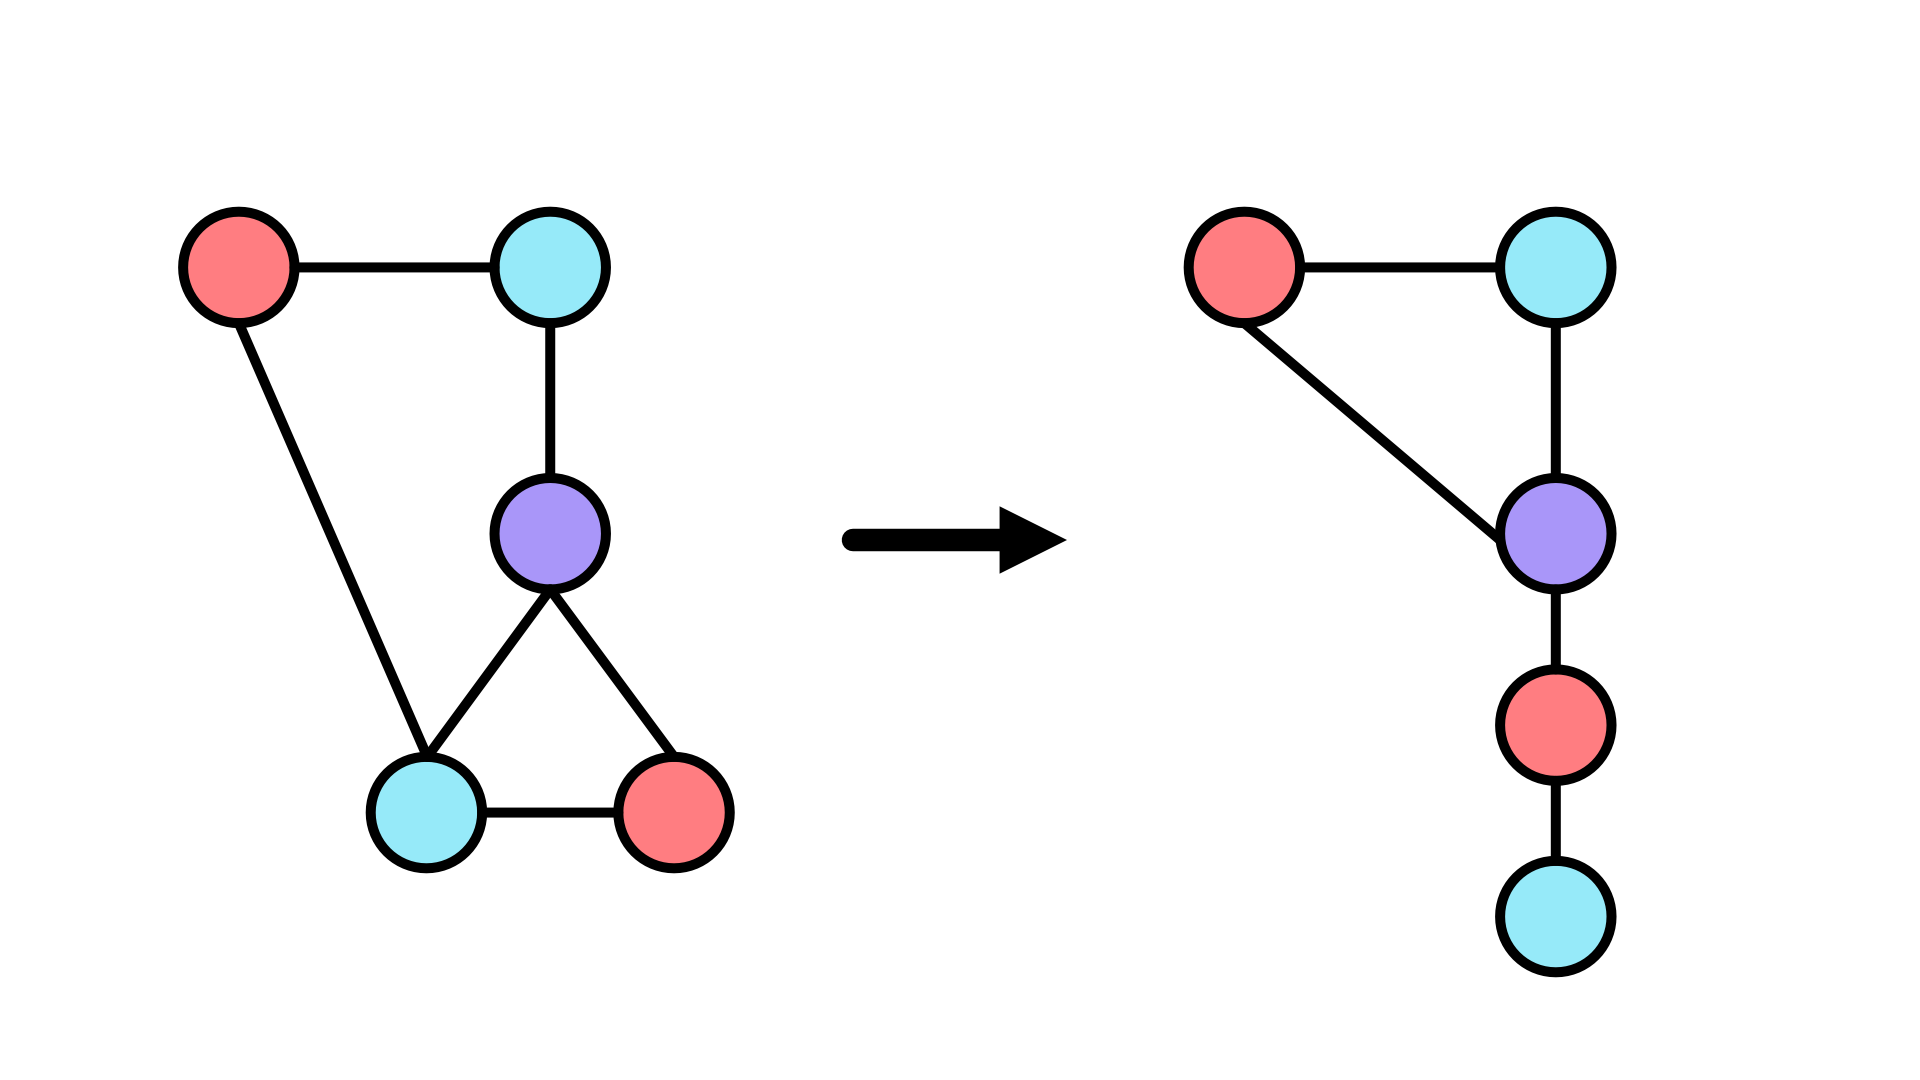
Our rewrite algorithm will shift the blue node to only connect to the red one, and move all connections originally on the blue node to the purple one. In this case, I decided to drop the original connection between the purple and blue nodes, but you could also have purple connect to itself if desired.
And that’s graph rewriting in a nutshell: a collection of patterns to look for and rules for how to replace them. The rest is up to you to define, but you may be wondering how to actually get the starting graph to work with.
Generating the starting graph
There’s a few common options for generating graphs and while there’s no right or wrong answer, different techniques will probably appeal to you depending on your intended usage.
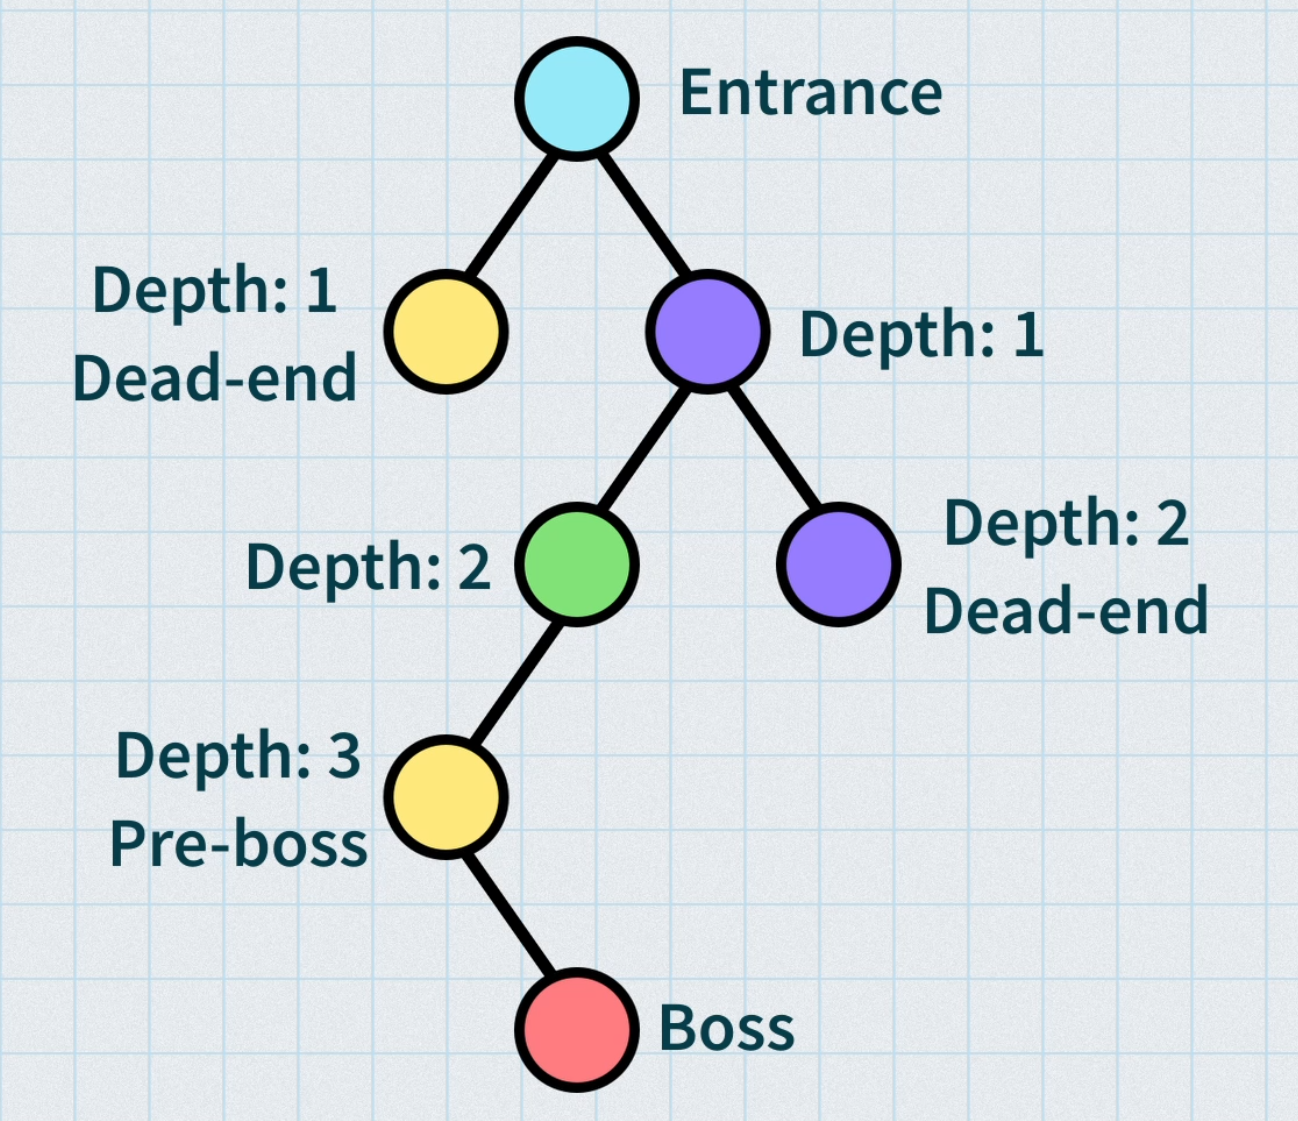
One approach, used in the Metazelda algorithm, is to first generate a tree, store metadata about the generation process at each node, and then randomly connect neighboring nodes to one another that meet certain conditions. These conditions can be things like only connect nodes that have a similar difficulty level, similar, or at least compatible, key or item requirements, and so on. The nice thing about the tree structure is that you can easily track how “deep” each node is in the tree, making it easy to add lock and key puzzles, adjust difficulty based on player progress, and know where a good spot exists to put valuable loot or even the end of the level.
Another approach is to do what is essentially a random walk where you place a starting node, add a random number of nodes and connect them to the starting node, move to one of the newly generated nodes, and repeat until you have a graph of the desire shape or size.
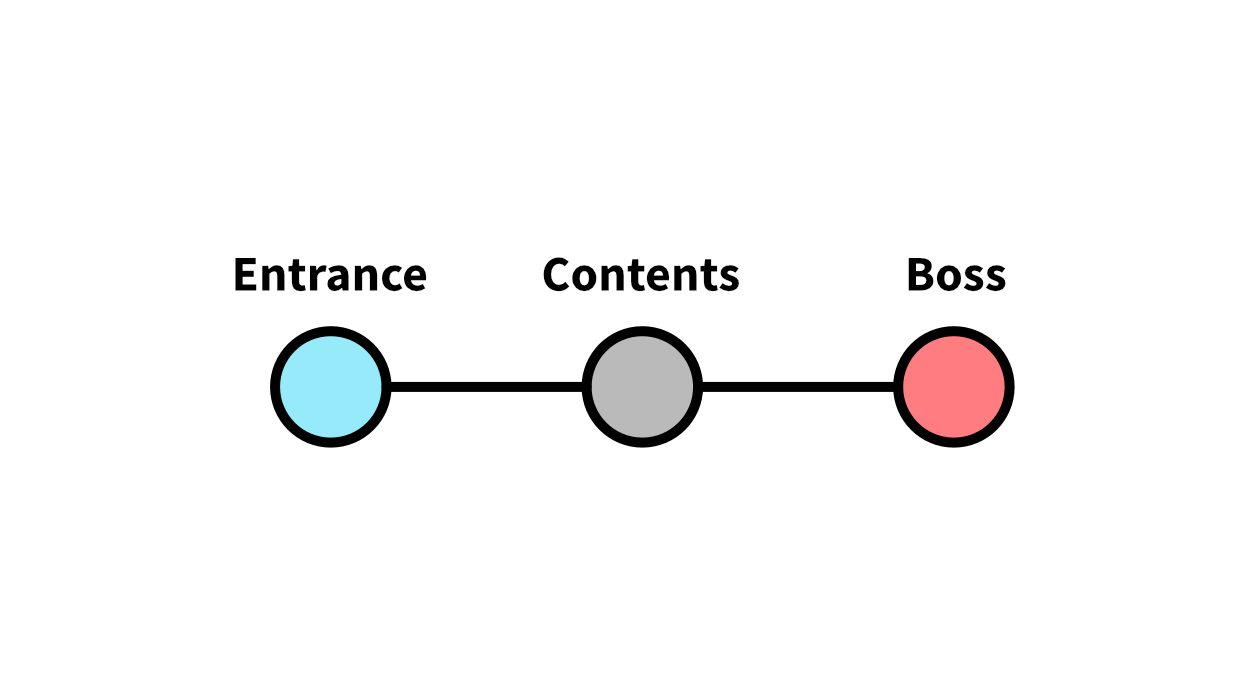
And lastly you can always manually define one or more graphs to start with and use that to seed the rewrite. If you’re generating a dungeon, for instance, you may want to start off with entrance and exit nodes and let the algorithm fill in the details. For generating a quest, you could define a few basic beats you want, and so on.
Uses
Now that we know what the process looks like, let’s take a look at what we can actually do with it. Because this technique is so generic, you can go a lot of ways with it, so just consider these examples a starting point.
Level generation
As we’ve already seen, level generation is an obvious use case for graph rewriting, and the type of level can be anything: open world, grid-based, etc. So here’s some examples of using graphs to generate 2D and 3D levels.
Turning a node into a space
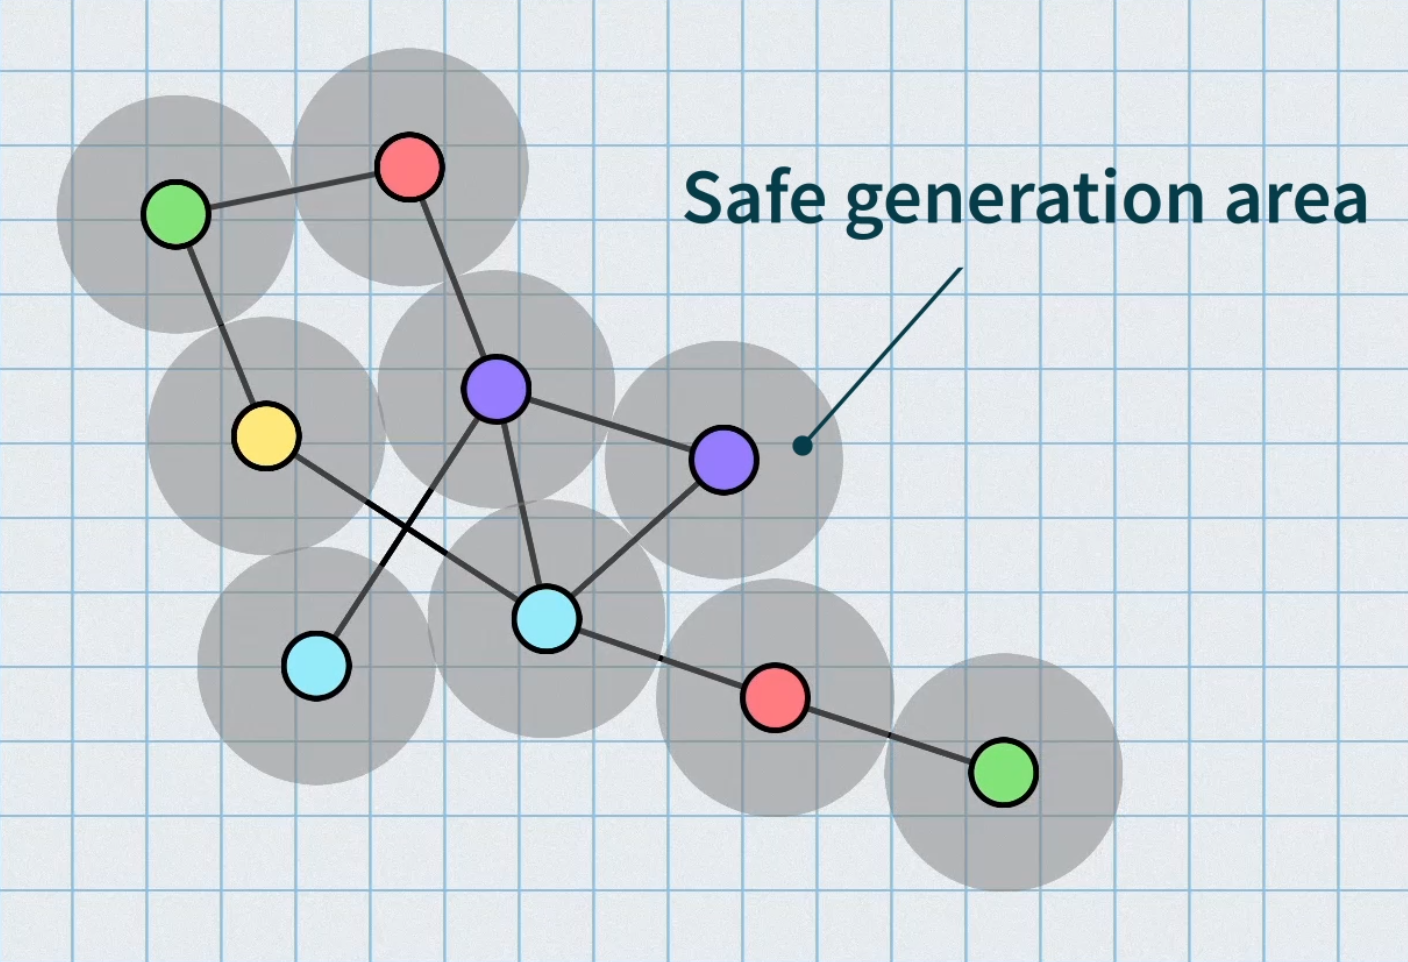
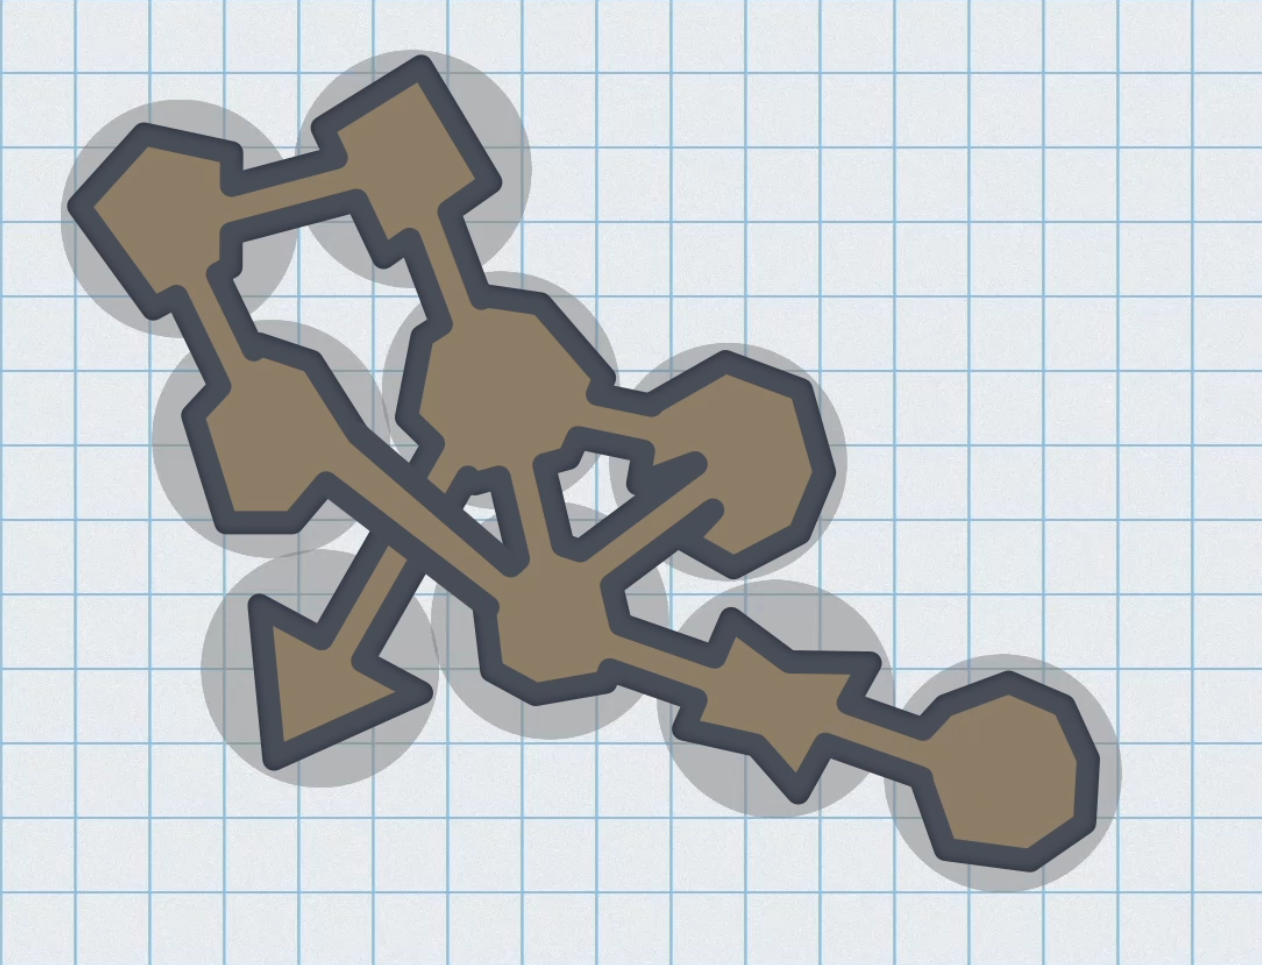
While grid-based level layouts are very common in procedurally generated levels, it is possible to take a connected graph of any shape and turn it into a topologically consistent space. Most examples of this I’ve seen use physics simulations to achieve this goal. They’ll start by placing each node far apart from each other and then apply spring-like forces to each node to pull it towards those nodes it’s connected to while simultaneously applying forces to push all nodes in the graph away from it by a certain amount so that it has an area in the game world to itself to carve out a room or other playable space. Once the simulation has run long enough to stabilize, you’ve got your level laid out and can connect your spaces with tunnels, hallways, or other connecting glue.
Grid-based dungeons
With a grid-based dungeon, such as in a 2D Zelda game, we can use our nodes to represent rooms and store their grid position so that we can only place new nodes in unused grid cells. Once the graph is ready to go, we can snap the nodes directly to the grid and place doors based on where our edges are. We’ll need some extra logic when generating the graph so that we don’t end up with too many connections or a dungeon that requires too much backtracking, but that’s all just details of the implementation.
Lock and key dungeons
With both of these methods, we can also add in lock and key or other kinds of puzzles to make the level more interesting. Using the tree method of graph generation, we can track which rooms come before others, and therefore know where we can place a key and what edges we can lock. I’ve talked about lock and key puzzles previously, so check out that post if you want to dive in further.
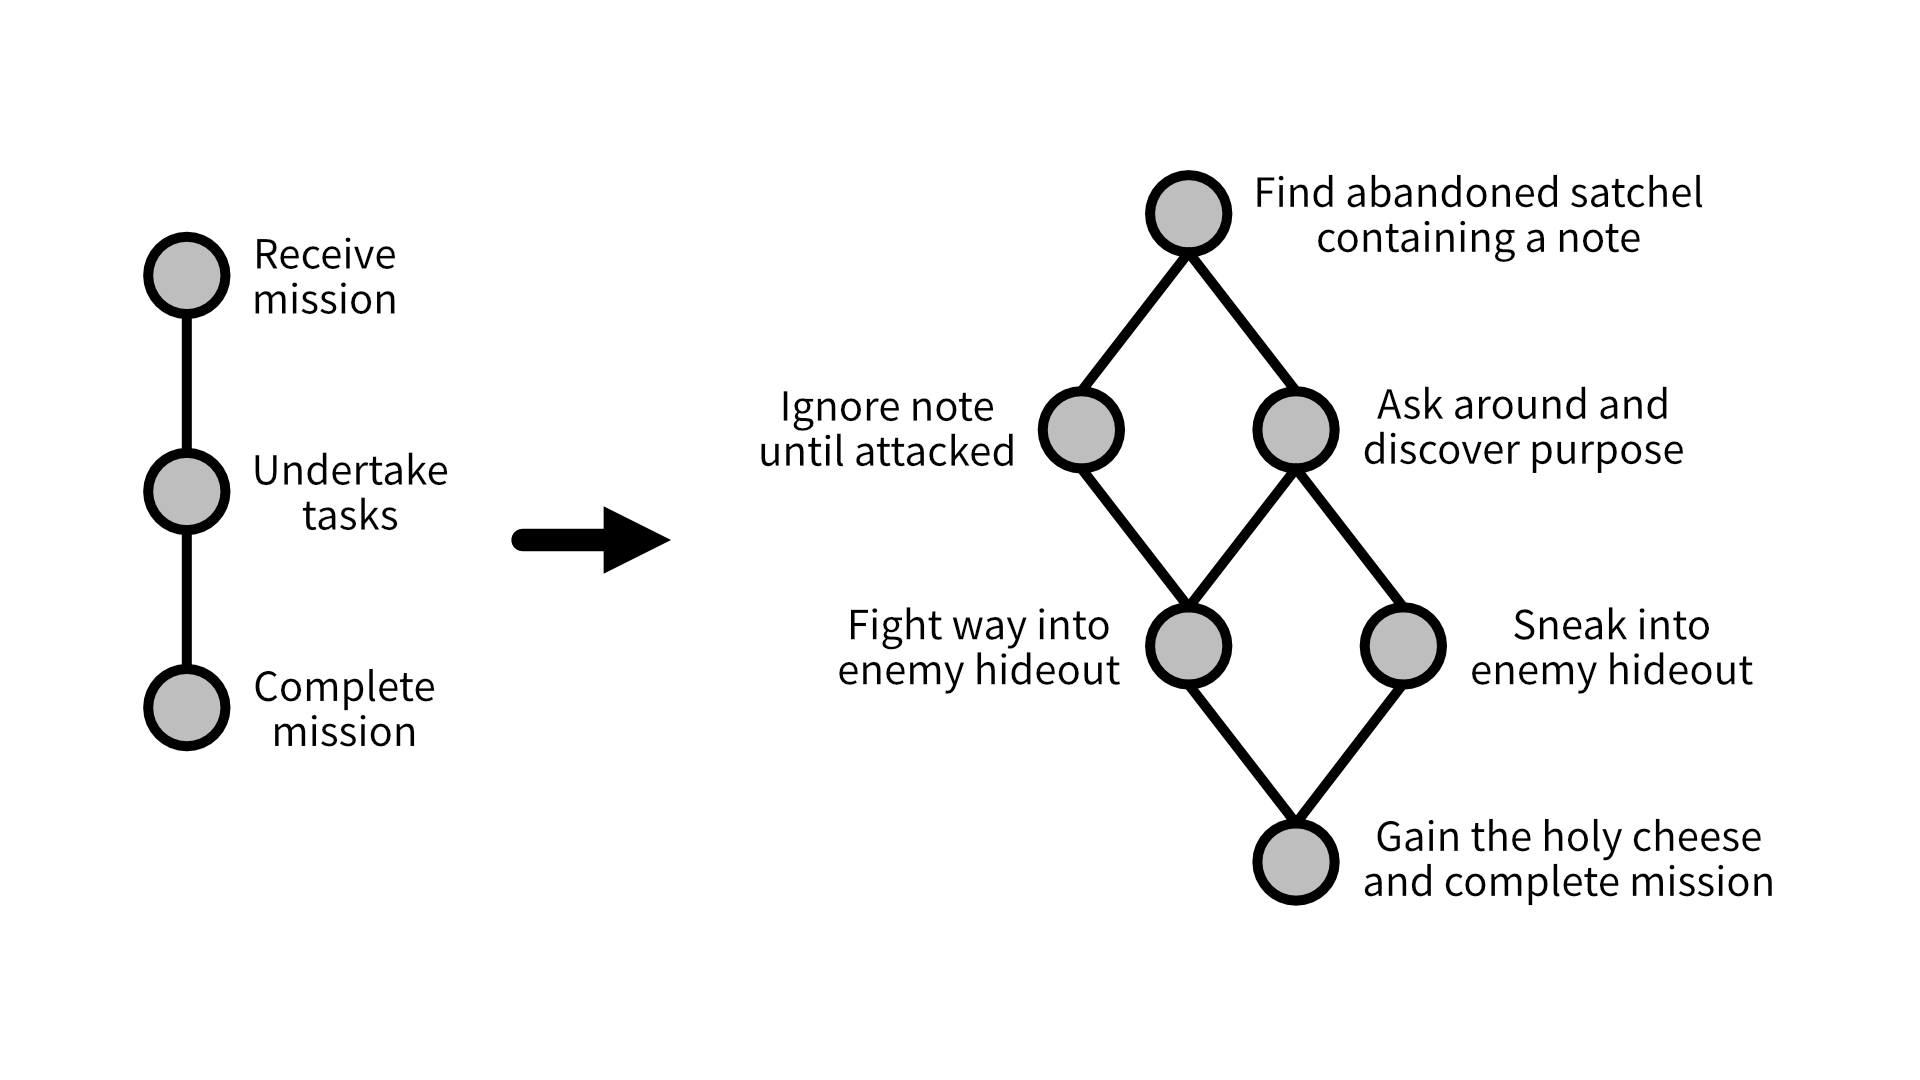
Mission structures
Another use of graph rewriting is to generate missions. Similar to graph grammars, we can have each node represent a step in the mission to complete, but with a data structure that is much better equipped to handle branching and conditional paths. Once you have a mission structure together, you can then run it through another rewrite system to turn it into a playable space!
Conclusion
And that’s a look at graph rewriting. It’s a really interesting technique for procedurally generating content for your game with a lot of flexibility to it. It may require you to spend an afternoon refreshing yourself on data structures and algorithms to fully implement, but it’s worth it due to just how much it offers.
And here’s a few links you might want to check out regarding implementation: