In my last post, I talked about the general application architecture of a tactics game that I’m building using Godot. Now, let’s dive a bit deeper into the development of units and some of the techniques I’m using and oddities I’ve ran into with them in these early stages. First off, though, if you’ll recall, I showed off two different prototypes. A sci-fi pixel art game, and a Kaiju Klash spinoff:
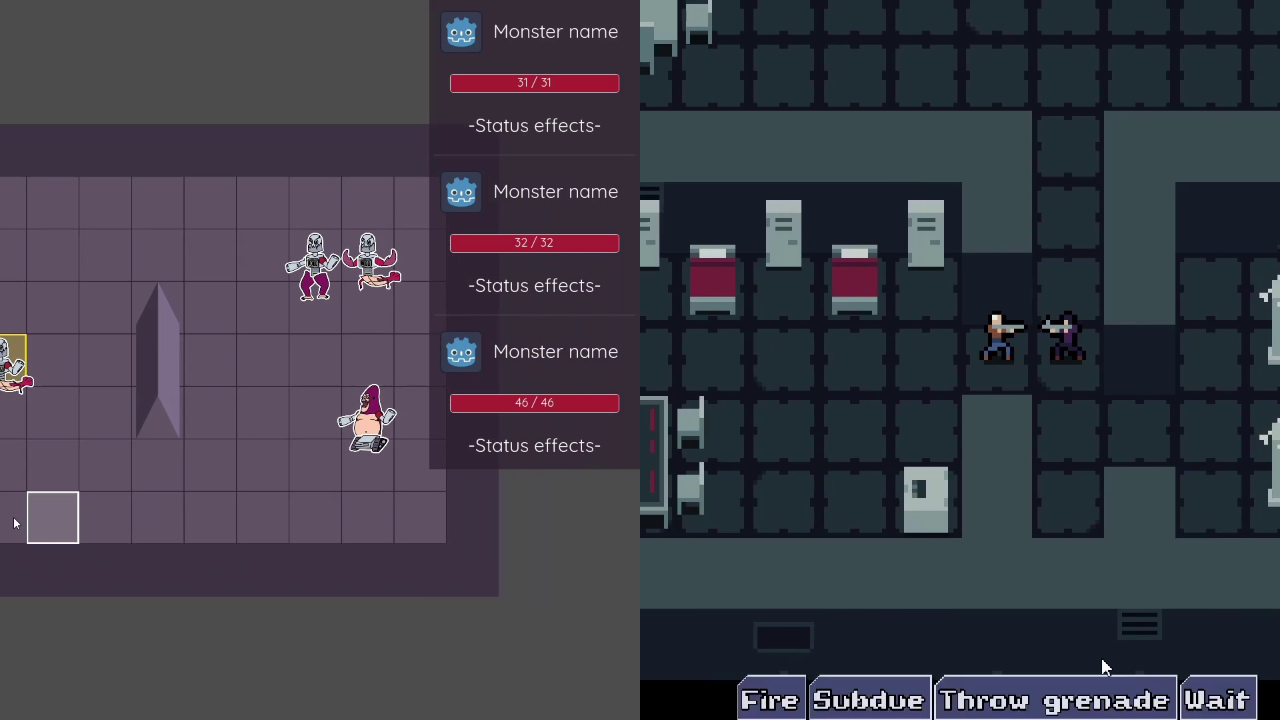
Well, I’ve decided to focus on the build-your-own-monster-them-up Kaiju Klash spinoff going forward. The general idea will be to build up a team of mega monsters cobbled together from various parts, each with unique abilities and stats, and travel to different themed arenas around the world on you path to global glory. I’ve decided to go this direction over the sci-fi game as I’ve got some bigger ideas in mind for the sci-fi game that I want to let stew (and some techniques I want to research) for a bit longer. With the Kaiju Klash spinoff, though, I can take the design aspects from that game that worked, along with a whole bunch of ideas left on the cutting room floor, and give myself a head start on this one. As I feel Kaiju Klash probably should have been a tactics game instead of a turn-based battler anyways, there’s no shortage of ideas to build off of here. This will save me some time and effort early on and let me focus on the technical aspect of building out a full tactics game, as, while I’m flattered how well received my last post was, I am very much trying to figure out a lot of this as a I go since resources are a bit scarce for this type of game.
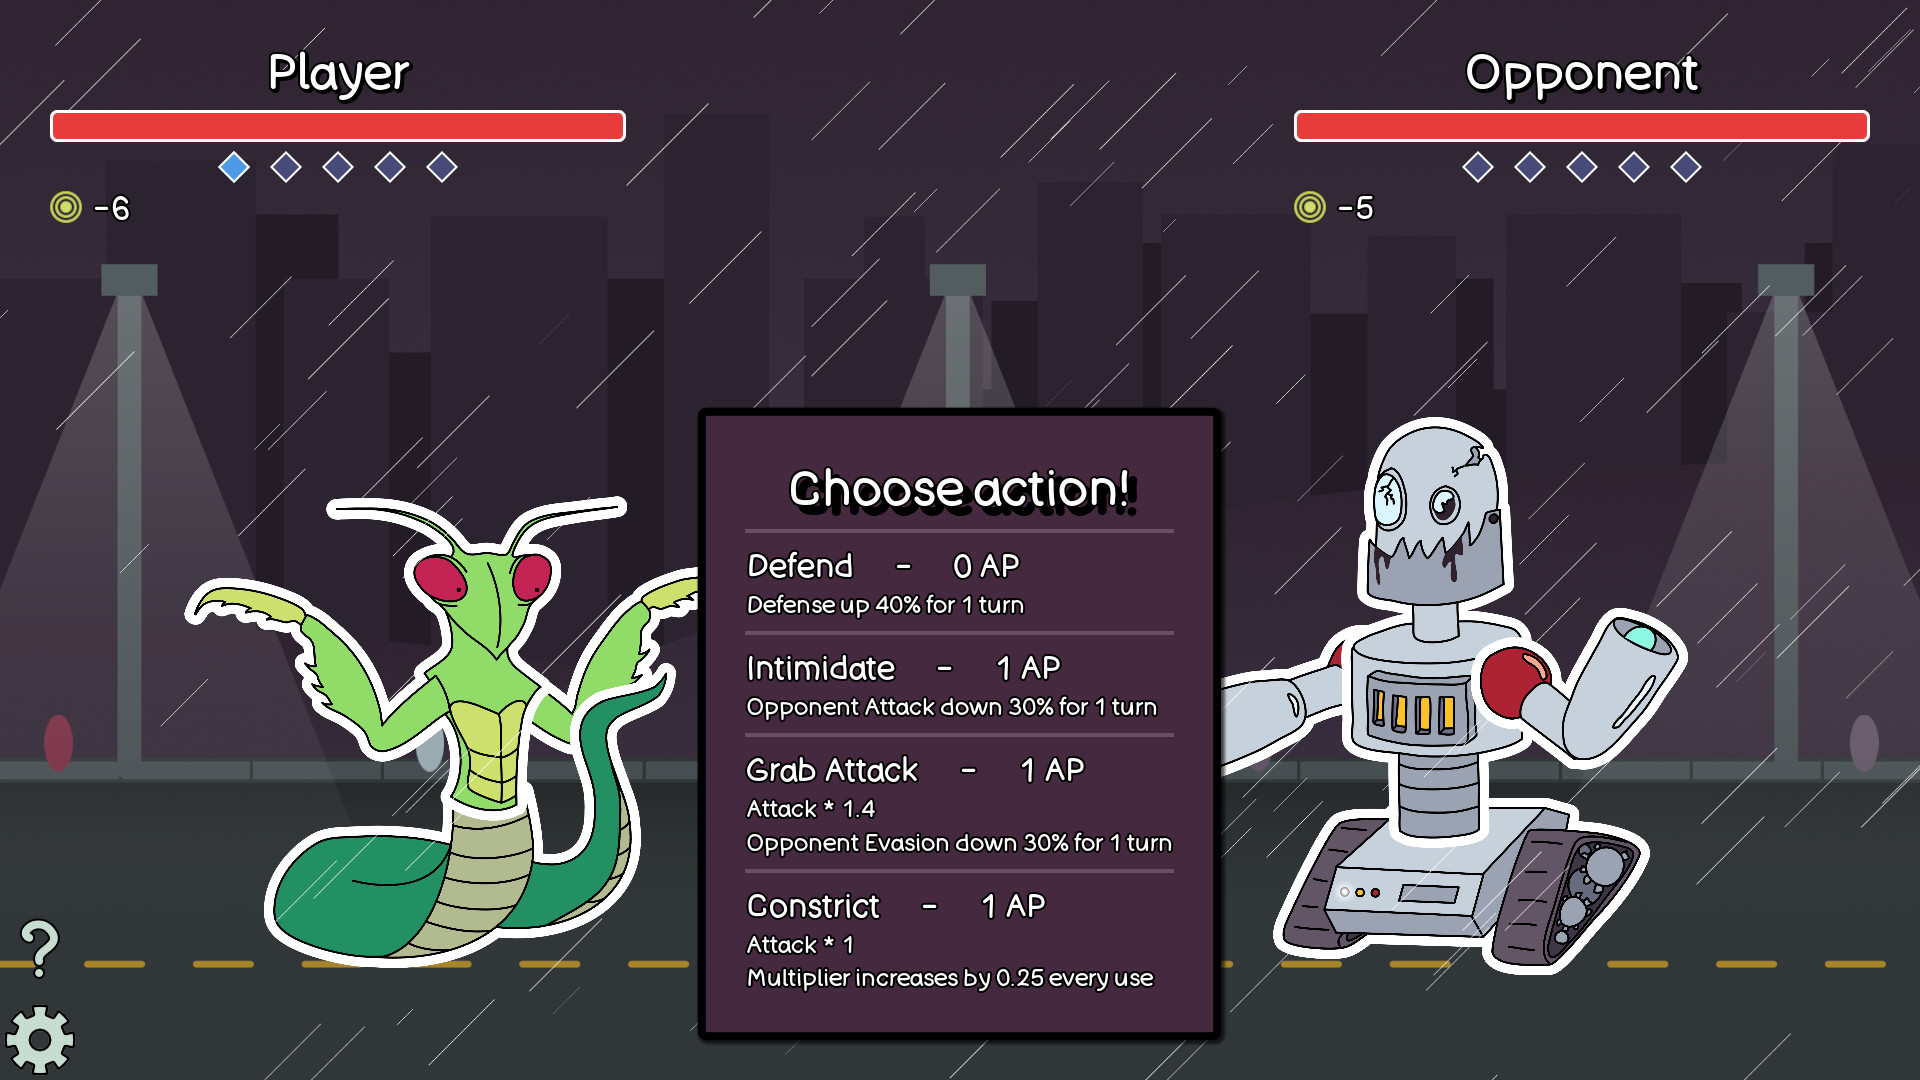 My small turn-based battler, Kaiju Klash. This image probably captures most of what you need to know about it.
Units - Part II
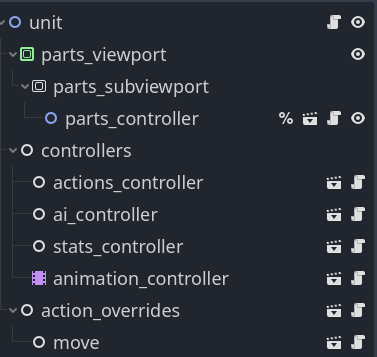
So with that established, let’s talk a bit more about how units are implemented. As a refresher, here’s the diagram from the previous post about how units are structured:
Unit
  |----- Art implementation
  |----- Controllers
            |----- AI Controller
            |----- Action Controller
            |----- Stats Controller
            |----- Animation Controller
  |----- Action Overrides
            |----- Movement Override
As discussed in my last post, controllers are responsible for some singular aspect of a unit’s operation, and action overrides are for actions that don’t fit neatly into my regular action flow. The remaining pieces, which I’d like to talk about today, are how unit data is structured and loaded, what details “Art implementation” is hiding, and how the AI Controller works.
Data
There’s a few requirements that drive how unit data needs to be structured:
- Teams will have a variable number of units.
- Each unit will be composed of three parts: A torso, arms, and legs. Technically, “arms” and “legs” are used a bit fluidly here since wings, tentacles, and whatnot will also be in the game, but the idea remains that there’s an upper torso attachment (“arms”) and a lower torso attachment (“legs”).
- While still in the early design stages, I’m going to explore having feats, xp, and other unique information on parts. Therefore, every part should be unique from every other part, even if, for example, they’re both gorilla arms.
- The player should be able to shop for parts, assign them to units, and swap parts between units. Therefore, units need to be flexible and dynamic in regards to any data related to parts.
The key idea behind all of these points that you may have noticed is that data will be fairly dynamic. To support that, there’s three layers to unit data: Battle Parties, Unit Definitions, and Part Definitions.
Battle Parties
Battle Parties are the simplest data structure as they’re just data containers holding references to the units that belong to a specific group of combatants, such as the player’s units, so that other components can access as appropriate. In fact, at this point in time, this is the entirety of the Battle Party code.
class_name BattleParty
extends Resource

@export
var units: Array[UnitDefinition]

func add_new_unit() -> void:
	var new_unit = UnitDefinition.new()
	units.append(new_unit)
Unit Definitions
Unit definitions where the data for a specific unit are defined and held, along with a few helper functions. This consists of the name for that unit, the parts that it holds, and functions for dealing with adding and removing parts.
class_name UnitDefinition
extends Resource

signal parts_updated

var torso: PartDefinition
var arms: PartDefinition
var legs: PartDefinition

var name: String = 'Monster name'

#
# Various helper functions, like adding and removing parts and emitting signals
# Ex:
func set_part(part: PartDefinition) -> void:
	match part.part_type:
		PartDefinition.PartType.Torso:
			torso = part
		PartDefinition.PartType.Arms:
			arms = part
		PartDefinition.PartType.Legs:
			legs = part
		_:
			push_error('Attempting to attach part at invalid location: %s' % part.part_type)
	parts_updated.emit()
This is, again, not a particularly complex data structure, but it helps ensure that unique data has a place to live. The only assumption made is the core unit structure of torso, arms, and legs.
Part Definitions
Part Definitions are, as the name would suggest, where parts and a variety of data related to them are defined. This includes both globally constant data, such as the maximum value any part can have, and local data, such as the stats for a specific part instance. For example, at the top of the file are constants defining how stats should scale as a part gets stronger and enumerators defining exactly what type of part a specific instance is.
class_name PartDefinition
extends Resource

# Min value that a part can have
const MIN_VALUE: int = 100
# Max value that a part can have
const MAX_VALUE: int = 100_000
# Scaling factor from min stats to max
const MAX_VALUE_BASE_STATS_MULT: float = 100.0
# Max level disadvantaged stats can scale to
const ZERO_STAT_SCALING_MAX: int = 20

enum PartType {
	Torso,
	Legs,
	Arms
}

enum MonsterType {
	Lobster,
	Robot,
	Gorilla
}

# Used for type advantage calculations
enum ClassType {
	Land,
	Aquatic,
	Technology
}
After that, the variables specific to an instance are defined:
@export_group('Part Definition')
@export
var monster_type: PartDefinition.MonsterType
@export
var part_type: PartDefinition.PartType
@export
var class_type: PartDefinition.ClassType
# The scene that will be used any time the part needs to be rendered
# We'll come back to this in a bit
@export
var instance_scene: PackedScene
# The icon to show in inventory and shop slots
@export
var icon: Texture
# The "worth" of a part. Affects price, resell value, part strength, etc.
@export
var value: int = 0

@export_group('Actions')
# The actions a part can take. See the first devlog for more about actions.
@export
var actions: Array[Action]

# These are the stats a part at minimum value will have.
# As stat scaling is based on these numbers, they also define how a part will grow over time.
@export_group('Part Base Stats')
@export
var base_health: int = 0
@export
var base_speed: int = 0
@export
var base_strength: int = 0
@export
var base_dexterity: int = 0
@export
var base_defense: int = 0

# The value-adjusted stats for this part.
# Kept as a dictionary so other scripts can ask about specific stats using the UnitStats.Stat enumerator.
@export_group('Current Stats')
@export
var stats = {
	UnitStats.Stat.Health: 0,
	UnitStats.Stat.Speed: 0,
	UnitStats.Stat.Strength: 0,
	UnitStats.Stat.Dexterity: 0,
	UnitStats.Stat.Defense: 0
}
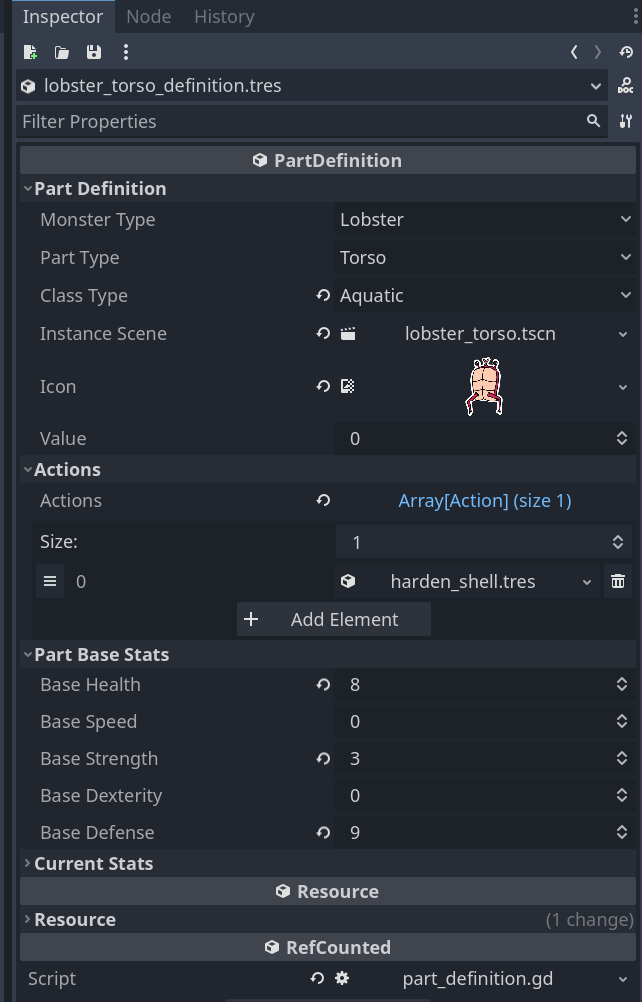
It’s worth noting at this point that each type of part has a base instance it can pull unchanging data from. Take a look at the screenshot below. This is a fixed resource that I have saved so I can easily tweak data related to all lobster torso instances from the inspector. When the game needs to generate a new lobster torso instance, it will pull things like the icon and base stats in from this base instance and then update things like its value, current stats, and other unique parameters I add over time based on data the game feeds it.
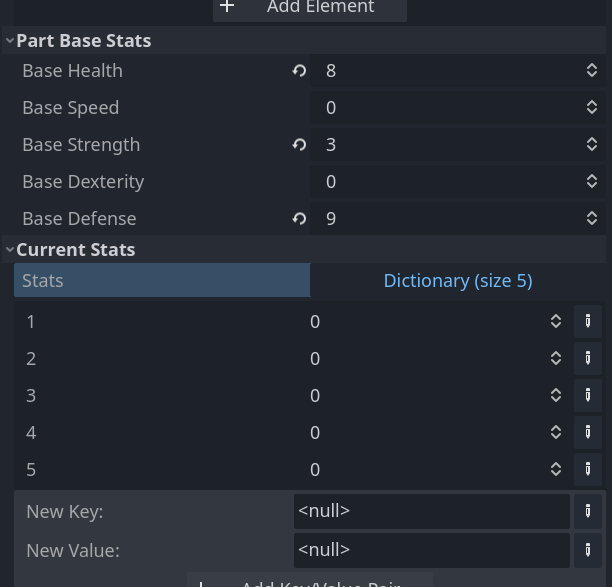
You may have also noticed that base stats have a different data structure than regular stats, and that’s due to a Godot quirk. As mentioned above, the base stats need to be editable in the inspector, whereas the current stats are dynamically handled and looked up at runtime. I use the enumerator values for the current stat values to make those lookups a little bit safer and easy to pass around, but Godot doesn’t let you use enumerator values as dictionary keys, at least not very well. If you use them as keys, you’ll just see the numeric representation as the name, which isn’t really helpful:
Since the base stats are primarily intended for internal use anyways, I opted to just put them under an export group and give them proper names.
Part definitions also contain a few helper functions, such as formatting the name to use for a part and handling stat scaling, which at this point in time is just a linear interpolation, but I’ll probably adjust that down the road:
# As a start, returns things like "Robot Arms". May modify this later on
func get_part_name() -> String:
	return '%s %s' % [MonsterType.keys()[monster_type], PartType.keys()[part_type]]

# Set up part based on the value it has
func init(part_value: int) -> void:
	value = int(clamp(part_value, MIN_VALUE, MAX_VALUE))
	_scale_stats_to_part_value()

# At this point, nothing fancy here. Just a linear mapping of value to stats
func _scale_stats_to_part_value() -> void:
	var normalized_value =clamp(
        # Remaps the range MIN_VALUE to MAX_VALUE to 0.0 to 1.0 and adjusts where value falls into that range appropriately
		remap(value, MIN_VALUE, MAX_VALUE, 0.0, 1.0),
		0.0,
		1.0
	)

	# Speed does not scale
	stats[UnitStats.Stat.Speed] = base_speed
	stats[UnitStats.Stat.Health] = int(floor(lerp(base_health, _get_max_stat_value(base_health), normalized_value)))
	stats[UnitStats.Stat.Strength] = int(floor(lerp(base_strength, _get_max_stat_value(base_strength), normalized_value)))
	stats[UnitStats.Stat.Dexterity] = int(floor(lerp(base_dexterity, _get_max_stat_value(base_dexterity), normalized_value)))
	stats[UnitStats.Stat.Defense] = int(floor(lerp(base_defense, _get_max_stat_value(base_defense), normalized_value)))

# Finds the max value a stat can be at for scaling purposes.
# Note that base_stats with a value of 0 have more limited scaling options.
func _get_max_stat_value(base_stat: int) -> int:
	if base_stat == 0:
		return ZERO_STAT_SCALING_MAX
	return int(floor(base_stat * MAX_VALUE_BASE_STATS_MULT))
Summing it up
And that’s a look at how unit data is managed in the game. Battle parties contain units, units contain parts, and parts contain the bulk of actually useful data. Related stats, such as the total health on a unit, are calculated on initialization based on these data definitions.
Artwork
Now that we know how units are defined in data, let’s take a detour to talk about art, as art for the monsters is not as straightforward as just layering some images on top of each other.
Part scenes
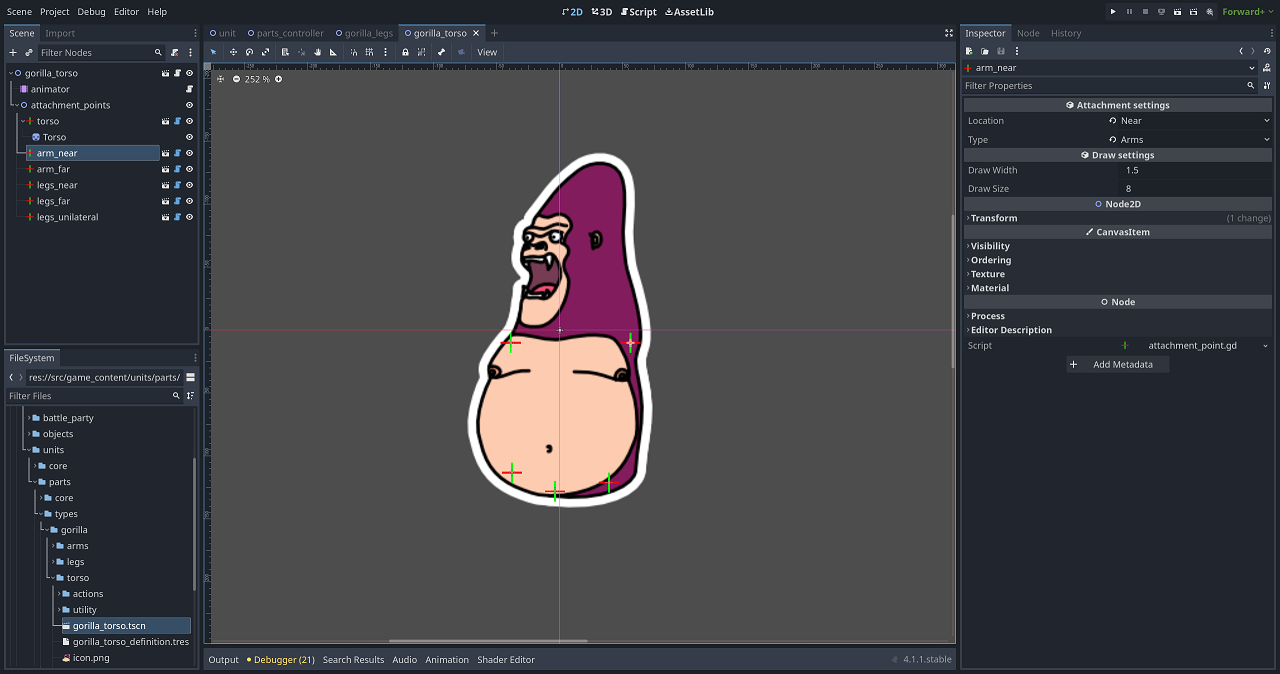
The first thing to note about parts is that each part has a scene that it can instantiate for rendering and animation:
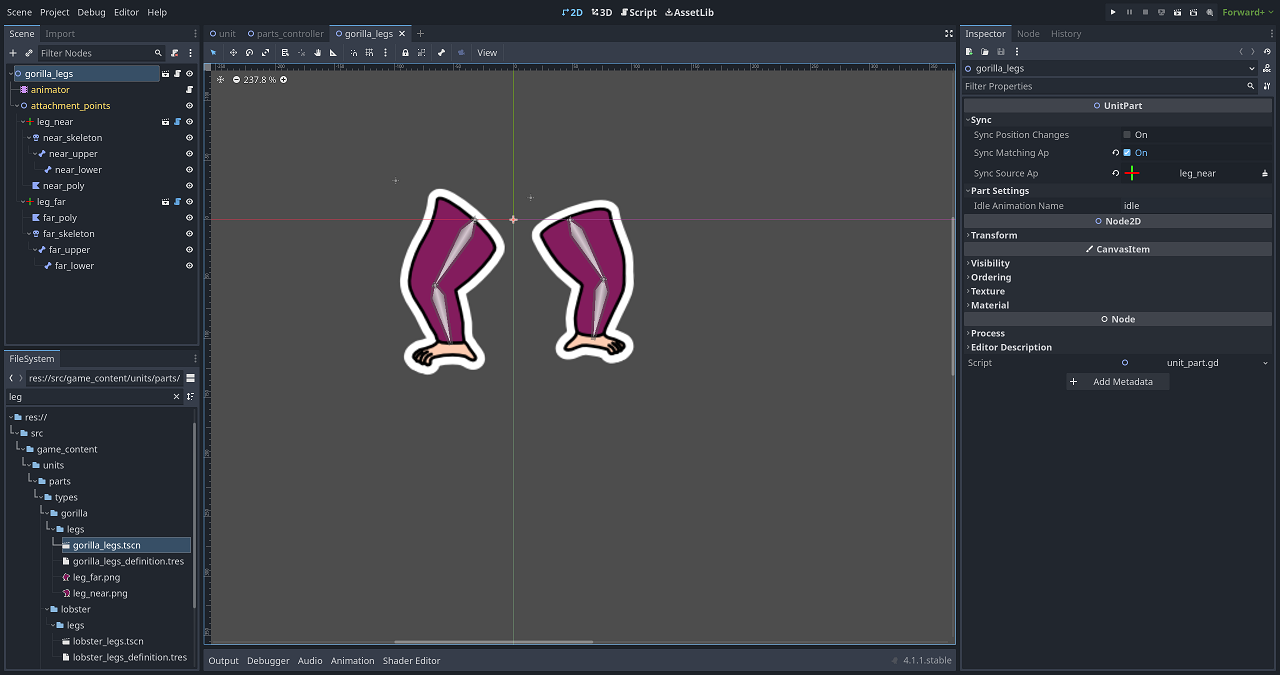
This scene holds sprites, animations for each move, and defines Attachment Points, which are simple 2D objects that define how parts should snap to one another. So each torso has Attachment Points on it located where each arm and leg should attach to it and marked for the appropriate limb, and each arm and leg has a matching Attachment Point with artwork placed relative to that location as appropriate. When a limb gets attached to the torso, these two points line up the artwork appropriately and, as long as you make any animations relative to their attachment point, you end up with a flexible system for letting parts connect to one another in whatever way they deem fit.
Parts also have the option to sync their positions with one another. So the torso, for instance, can tell the arms and legs to move with it for normal use, but if another part needs to override it at some point, maybe so a character can jump in the air and coordinate the rest of the body with the leg animation, that’s also an option.
Beyond those two features, part scenes really are just art containers. I used a similar, but simpler, implementation in Kaiju Klash and was generally satisfied with this approach as I found each part tended to have unique needs, whether that be animating with skeletal animations versus simple cutout-style rotations, or just so I could add custom particles and sound effects easily.
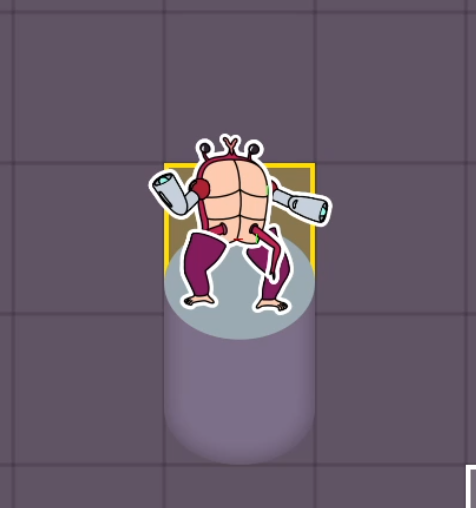
Layering parts
Unlike Kaiju Klash, though, getting parts to layer correctly proved to be more complicated than just adjusting the z-index on each part. That works fine for adjusting parts relative to each other, but it turns out that z-indexing in Godot doesn’t play so well with y-sorting, which is a requirement since I want environmental objects to be able to partially obscure monsters and other game objects. When you have both in a scene, the end result is that objects with the default z-order get y-sorted, but those with non-default values don’t.
There’s two ideas I’ve been considering for getting around this issue.
The first, and what I currently have in the game as it was the fastest to integrate with my existing implementation, is to render the final collection of parts to a subviewport. In case you’re unfamiliar with subviewports, this is basically Godot’s way of doing a render-to-texture from within the scene tree, which means you can take advantage of nodes, scenes, and other Godot goodness. This solves the issue as now I can order parts based on z-index inside the subviewport and then let that get y-sorted. The biggest downside to this approach is that since the parts no longer exist in the main world, particles and other effects that may go outside the viewport get cutoff, which means I either have to make the viewports larger or dynamically instantiate these effects outside of the viewport. There is, of course, also the performance downside of rendering extra pixels, but my games aren’t exactly pushing the limits of graphical fidelity, so while I will performance test this at some point, I don’t anticipate this will make or break the game for most systems.
The other idea is to duplicate the parts container and have one copy sit higher in the scene tree for parts that should be in front and the other sit right behind it for parts that should be in the back (and maybe even adding a third as a middle layer). I could then choose what to render on a per-artwork basis depending on which container it resides in and where it should draw relative to other parts. This is probably more performant, and potentially more flexible, but the downside is that I’d have to dynamically disable sounds, particles, and so on for one container so they don’t get duplicated. There’s also a bit of added complexity around coordinating part positions and animations across multiple scenes representing the same “thing”, and the fact that I’d be locking myself into a fixed number of layers that parts could fall into, which is potentially problematic as some individual parts are actually composed of several layers of graphics. Not the end of the world to deal with all of this, but there’s enough downsides that I’m not convinced it’s the right call here.
If you can’t tell, I’m not sold on either solution, and I expect I’ll be revisiting this issue as development progresses, so if you have any thoughts please let me know!
A.I.
That’s enough of art for now, so let’s talk about the AI Controller and how the opponent units decide what to do. Since most opponents will be composed of a random, or at least semi-random, assortment of parts, I needed to implement an AI system that’s flexible and adaptive since I won’t know what actions the unit will be able to choose from ahead of time. If you’ve been around here a little while, then you may already know where this is going: Utility AI.
I’ve talked about this concept previously so I won’t go too in-depth here, but the high-level overview is that Utility AI is a way to let an entity score each potential action it can take based on the current game state and then select the best action based on those scores. You can apply weights based on changing priorities, add some randomness to make things less predictable, and apply a whole host of other modifiers to make things more interesting, but the core idea is still the same: score potential actions and choose the highest score.
In this game, each action a part can take has a utility scorer attached to it, which means that when a unit needs to pick an action, it gets some helpful data together and then lets each action tell it how useful it is:
# ai_controller.gd

func choose_next_action(actions: Array) -> ActionSelection:
	var decisions = []
	for action in actions:
		# A Context is a collection of game state data relevant to action scoring
		var context = _build_context(action)
		decisions.append(action.get_utility(context))

	# Sort by highest score with nulls at the end
	# Ultimately, nulls shouldn't be an issue, but for now it's possible
	# while actions and AI are still being worked on.
	decisions.sort_custom(
		func (d1, d2):
			if d1 == null and d2 != null:
				return false
			elif d1 != null and d2 == null:
				return true
			elif d1 == null and d2 == null:
				return false
			return d1.score > d2.score
	)

	var best_decision: UtilityDecision = decisions[0]

	# If no action is worth taking, just wait
	if best_decision != null and best_decision.score > 0.0:
		return best_decision.action_selection

	return ActionSelection.new(WAIT_ACTION, unit)
At a high level, this game uses a form of Infinite Axis Utility AI, which is a concept Dave Mark has spoken about at multiple GDC talks (See Improving AI Decision Modeling Through Utility Theory and Building a Better Centaur: AI at Massive Scale). This is essentially a framework for implementing Utility AI based on the idea that you’ll probably want to add, remove, and tweak parameters for action scoring as development progresses and will therefore need a system that’s inherently flexible with how it handles scoring. The design is also intended to be friendly to non-technical users, but since I’m doing pretty much everything except the art for this game, I do take a few shortcuts over his more robust implementation.
The ideas behind both systems are still the same, though. Each action has a list of concerns it wants to score, such as the distance to a potential target, how much damage an attack is likely to do, and so on. It normalizes and plots the score of each concern independently along a curve and then combines those scores together to get a final score for the action. The AI controller, which is really just a lightweight entrypoint to this system, can then pick which action scores the highest, or choose a random selection from the top scorers if it’s close (to be added), and pass this selection over to the Action Controller where it will actually be executed. If there’s more than one option an action can take, such as two units in range but the action can only target one, each option is scored internally by the action and only the best scoring option is returned.
To go further in-depth would involve summarizing a few hours worth of GDC talks, but the general flow ends up looking like this:
AI Contoller
|---- Action Decision Maker
      |---- Option A
	        |---- Consideration A1
			|---- Consideration A2
			|---- Etc...
	  |---- Option B
			|---- Consideration B1
			|---- Consideration B2
			|---- Etc...
As an example, let’s look at how a unit would score using a Pinch attack from lobster arms. This is a simple attack that is only concerned with how much damage it will do against a target. To run through the diagram, the AI Controller makes a Context object, which holds information such as a list of active enemy units and the unit taking the action, and passes it to the action’s Decision Maker. The Decision Maker will look at which units are in range for the attack and then score the attack for each in-range unit. The target that produces the highest score will be returned as the best this action can do right now. For each potential target to attack, it calculates how much damage the action will do to the target as a percent of its health and plots it along a curve.
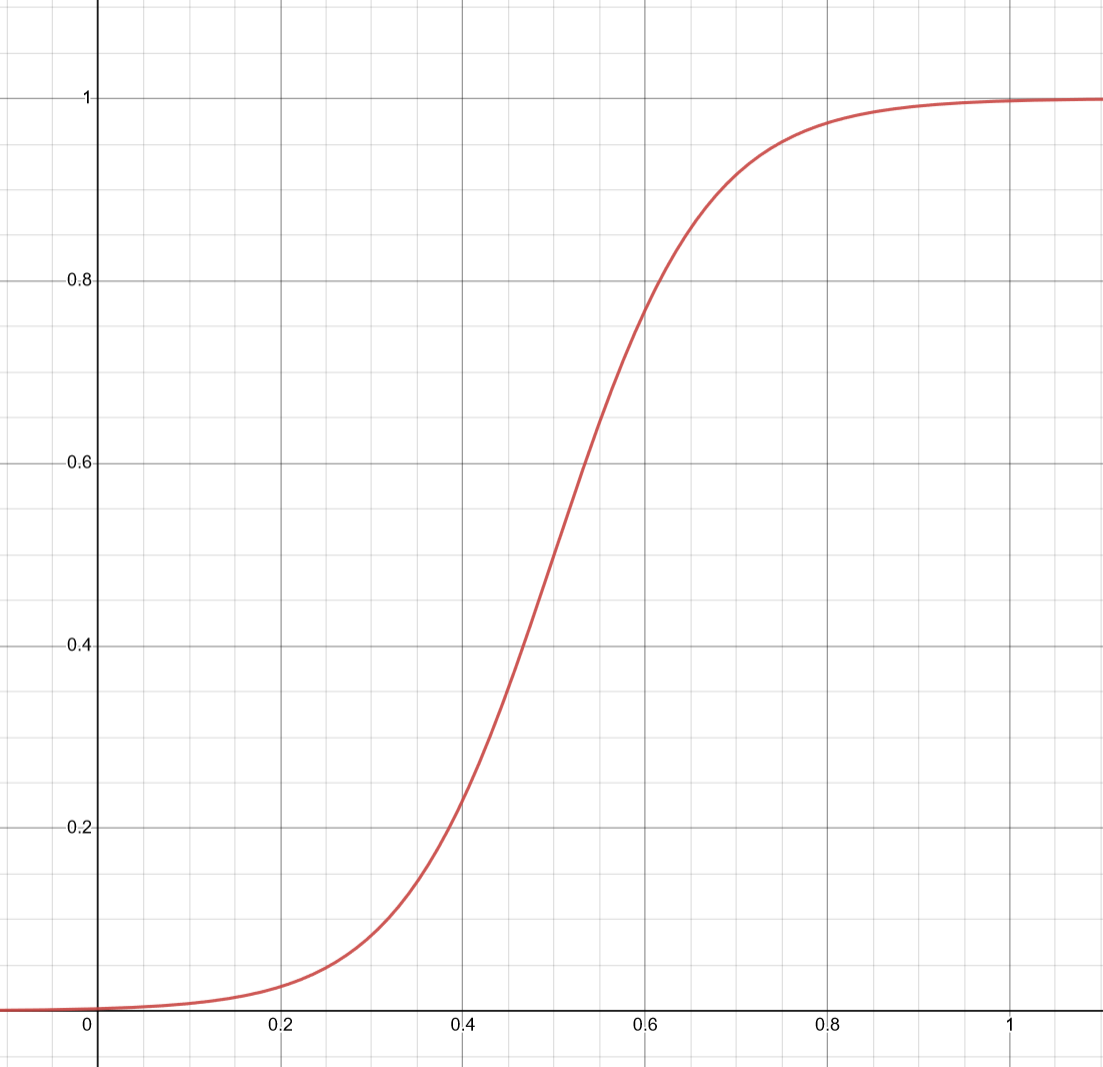 A starting point for damage-dealing attacks. May be tweaked later. Desmos has been very helpful for figuring all of this out.
The end result is a unit that really won’t worry too much about if it can do 5% damage against a target if there’s something more enticing available, but once those big hits are available, it will really start to pay attention. Of course, this is just a starting point and it most likely will change later.
In case you’re wondering, for an action that has multiple considerations, the process is the same. The action scoring step just adjusts its score based on the plotted value of all considerations, typically by averaging together though some actions can use a different formula for combining scores.
Wrapping up
And that’s a more in-depth look at how units work for this game. Thanks for reading and, as always, please reach out with any thoughts or questions!