Starter state machines in Godot 4
Here’s an updated look at how I like to do state machines in Godot 4. I’m going to go over some simpler, starter techniques today, and in the next post I’ll go in-depth about techniques you can use when today’s examples don’t cut it. Also, as a side note, if you’re unfamiliar with the general idea behind state machines, check out this post where I go over what the state pattern is and why you may be interested in it. So now, with all of that out of the way, let’s dive in.
Simple state management
The simplest way to manage state is by using an enumerator to track which state you’re in and branch your code using a switch statement wherever you have state-dependent logic that needs to run. A barebones example in GDScript might look like this:
enum State {
    Off,
    On
}

var current_state = State.Off

func _process(delta: float) -> void:
    match current_state:
        State.Off:
            # Do stuff when off
        State.On:
            # Do stuff when on
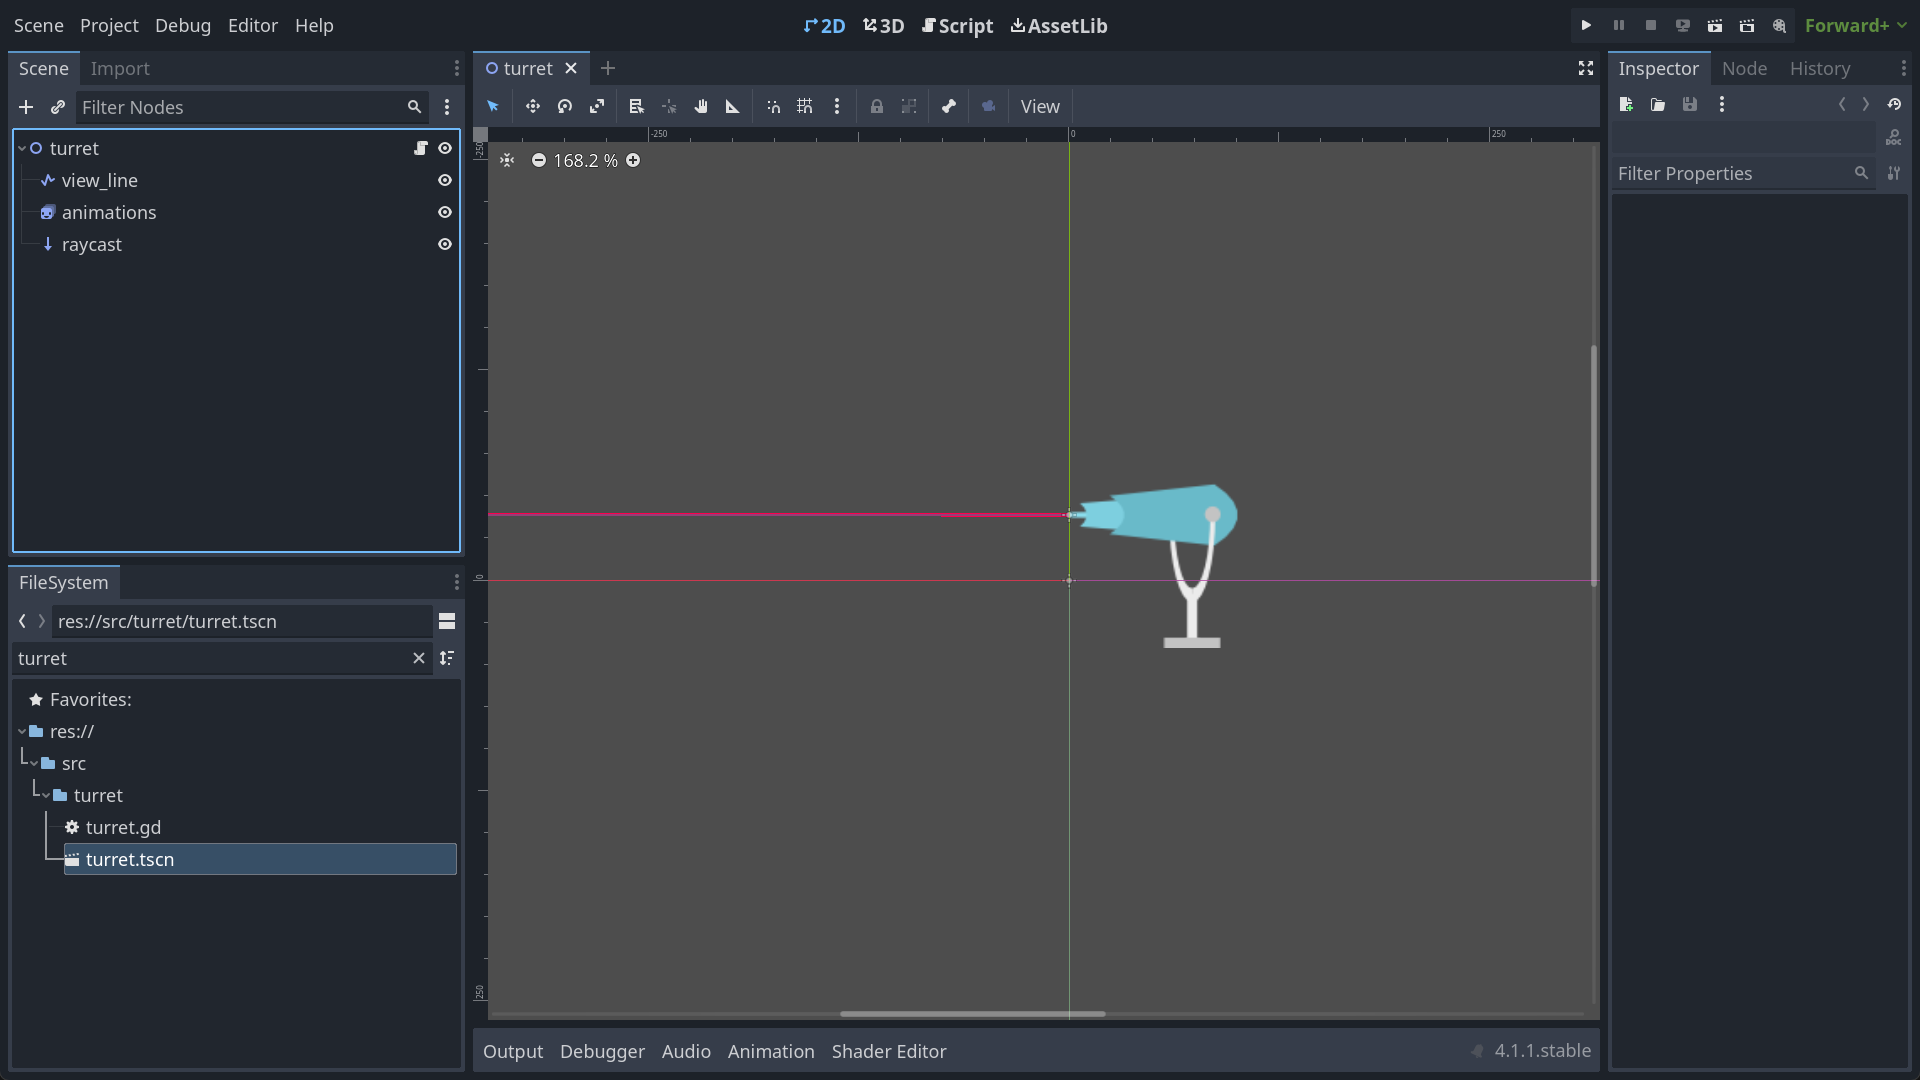
There’s nothing Godot-specific about this implementation, but I do want to bring it up for the sake of completeness, as it can come in handy whenever you have an object that just needs a little organizational help. The turrets in Liberation Mutagenix, for instance, use this technique of state management since they only have three simple states they can be in: scanning for targets, firing on a target, and recharging. In fact, let’s recreate a barebones version of a turret as an example of what we can do with this form of state management, which is included in the sample project if you want to see it in action. Our turret will:
- Default to a scanning state, where it waits for the player to enter its view
- Fire upon the player when it sees them
- Become dormant for some amount of time while it recharges before going back to scanning for the player
The turret scene is just an AnimatedSprite2D node, a Raycast2D node attached to it to detect when a physics body passes the turret, and a Line2D node so we can see where the Raycast2D is scanning. Since this is a demo, we’ll just change animations to show what state we’re in and move on without worrying about making the player react or anything like that.
The code looks like this:
extends Node2D

# What state the turret is in
enum TurretState {
	Scanning,
	Firing,
	Recharging
}

# How long to stay in the firing and recharge states
@export
var firing_time: float = 0.5
@export
var recharge_time: float = 2.0

# Grab a reference to the nodes we need
@onready
var animations = $animations
@onready
var raycast = $raycast
@onready
var view_line = $view_line

# Set the default state
var current_state: TurretState = TurretState.Scanning
# This timer will count down to our next state change
var state_change_timer: float = 0.0

# Handles everything related to changing states
# You could also move each state's setup into a separate function if you had a lot to do.
func change_state(new_state: TurretState) -> void:
	current_state = new_state
	match current_state:
		TurretState.Scanning:
			animations.play('scanning')
			view_line.visible = true
		TurretState.Firing:
			# Firing just plays an animation and moves on for demo purposes.
			animations.play('firing')
			state_change_timer = firing_time
			view_line.visible = false
		TurretState.Recharging:
			animations.play('recharging')
			state_change_timer = recharge_time
			view_line.visible = false

# Since we're dealing with a physics check on raycasting,
# scanning updates should happen during the physics update.
func _physics_process(delta: float) -> void:
	if current_state != TurretState.Scanning:
		return
	# Fire when the Player intersects the raycast.
	# Note this check requires that Player is a registered class_name
	# This is declared at the top of the player's script, which we'll see in a bit.
	var collider = raycast.get_collider()
	if collider and collider is Player:
		change_state(TurretState.Firing)

# Count down the timers and transition states when appropriate
func _process(delta: float) -> void:
	match current_state:
		TurretState.Firing:
			state_change_timer -= delta
			if state_change_timer <= 0.0:
				change_state(TurretState.Recharging)
		TurretState.Recharging:
			state_change_timer -= delta
			if state_change_timer <= 0.0:
				change_state(TurretState.Scanning)
The vast majority of this code is about just doing whatever each state needs to do as there’s very little overhead here. During the _process and _physics_process calls, we run different logic depending on what state we’re in and change states via the change_state function so we can handle any set up or tear down when changing states, such as playing animations and resetting timers. I did everything within the previously mentioned functions for simplicity since there’s not a lot going on here, but another option if you were to implement this technique in a game with more needs than just playing an animation and counting down a timer is to put the state-specific code into separate functions (physics_process_scanning, process_firing, enter_state_recharging, etc).
This technique is simple, effective, and makes it easy to expand the codebase over time while keeping things neater than using a bunch of if statements and conditional booleans to figure out which state the object is in. It’s definitely a go-to technique of mine, but when I have more than a fairly simple object to manage, I do prefer to reach for a more robust implementation.
A proper state machine
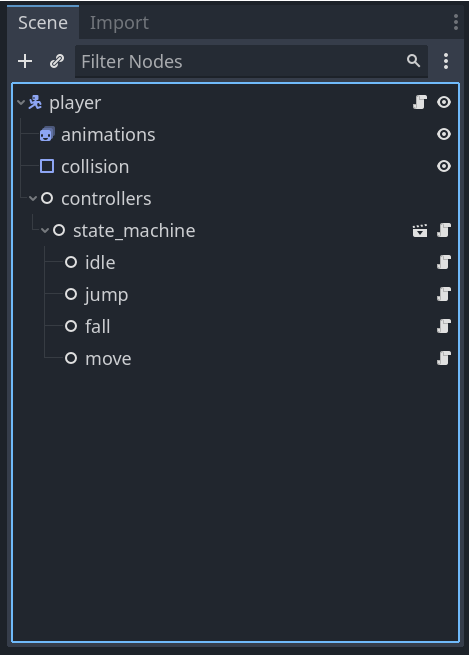
As opposed to a purely code-based solution, my preferred way of implementing a state-machine uses a Node-based approach. This approach consists of one node managing all of the states (named “state_machine” below since I find the name “manager” to be a bit non-descriptive and easy to abuse) and a number of child nodes as the actual state implementations. The parent object delegates logic resolution to this state manager, which then delegates to the active state and handles state transitions as appropriate. In practice, it looks something like this:
You could certainly build up more or less the same structure using only code, but I like this approach for a few reasons:
- The biggest reason is that it lets me take advantage of the features of the Godot editor. With Nodes, I can export variables to easily tweak them without having to go into my code, including for connecting state transitions. Plus, I can visually inspect my state machine in the editor. These two together make it easy to reason about and adjust my built state machine.
- It also lets me reuse my states on different objects by just dragging a Node into the editor and putting a script on it.
- And most subjectively, I just personally like this approach, find it intuitive, and feel that it meshes well with Godot’s approach to game development.
So with the why out of the way, let’s talk about the how by walking through a state machine designed to control the player character in a game, since character controllers are a common use case for state machines. We’ll focus on only the player for now as there’s already a lot to cover, and making this code work for multiple entities will require introducing some additional concepts. So if you find yourself wondering about something more advanced at any point, hold on to that thought! That’s what the next post is for.
The player
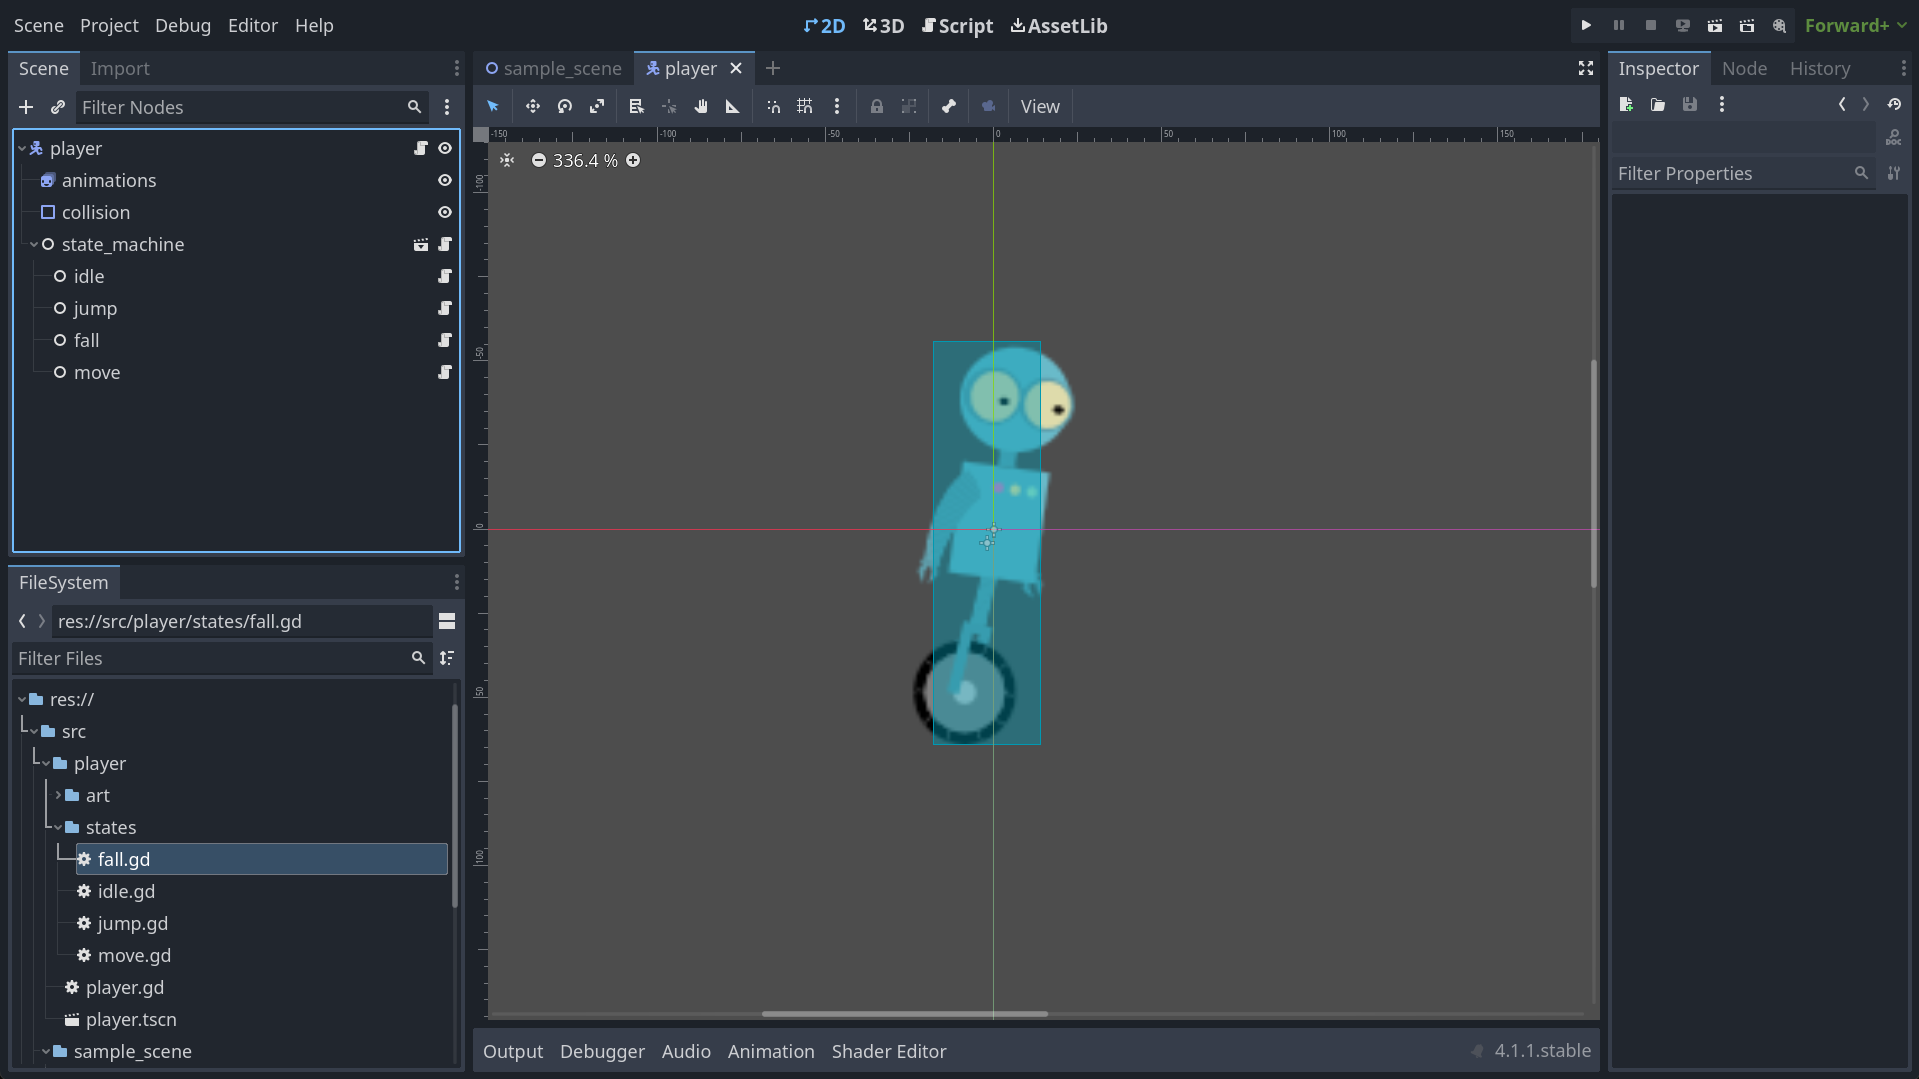
The Player is a CharacterBody2D node (previously KinematicBody2D) with CollisionShape2D, AnimatedSprite2D, and state machine nodes attached to help it operate.
The script on the Player looks like this:
class_name Player
extends CharacterBody2D

@onready
var animations = $animations

@onready
var state_machine = $state_machine

func _ready() -> void:
	# Initialize the state machine, passing a reference of the player to the states,
	# that way they can move and react accordingly
	state_machine.init(self)

func _unhandled_input(event: InputEvent) -> void:
	state_machine.process_input(event)

func _physics_process(delta: float) -> void:
	state_machine.process_physics(delta)

func _process(delta: float) -> void:
	state_machine.process_frame(delta)
Not a lot to it as the Player really just delegates any state-dependent logic to the state machine for further processing, such as with the _physics_process or _unhandled_input functions. It does also pass a reference to itself during the state machine initialization so that the states can have a reference to it and therefore control it directly. There are ways around this if you don’t like the idea of a child node controlling a parent, which I would normally agree with, but since the states are essentially hot-swappable “brains” for the Player, I’m ok with it in this instance. You may also have noticed this means our state machine can only work with a Player-type object and not any object that needs a state machine. That’s intentional for now to help simplify things for demonstration purposes. In the next post, we’ll look at how we can make our state machine work with other objects.
The state machine
Moving one step down we have the actual state machine. This component is responsible for managing the state of the parent object, delegating to the active state, and handling any state transitions that may be required. At its core, it’s just a Node with child state nodes. The script for it is:
extends Node

@export
var starting_state: State

var current_state: State

# Initialize the state machine by giving each child state a reference to the
# parent object it belongs to and enter the default starting_state.
func init(parent: Player) -> void:
	for child in get_children():
		child.parent = parent

	# Initialize to the default state
	change_state(starting_state)

# Change to the new state by first calling any exit logic on the current state.
func change_state(new_state: State) -> void:
	if current_state:
		current_state.exit()

	current_state = new_state
	current_state.enter()

# Pass through functions for the Player to call,
# handling state changes as needed.
func process_physics(delta: float) -> void:
	var new_state = current_state.process_physics(delta)
	if new_state:
		change_state(new_state)

func process_input(event: InputEvent) -> void:
	var new_state = current_state.process_input(event)
	if new_state:
		change_state(new_state)

func process_frame(delta: float) -> void:
	var new_state = current_state.process_frame(delta)
	if new_state:
		change_state(new_state)
Upon initialization, the state machine passes a reference to the parent to each child state and enters the default starting state. In case you’re wondering, you could let the state machine reach up the hierarchy to find the parent itself rather than have the reference passed as a parameter to the init function, but that can be an error-prone design (what if the parent isn’t a single node up the hierarchy on some objects?), so I don’t generally recommend it.
The rest of this node is as you would expect with the state pattern. Each state node can optionally return a new state to transition to after processing an event. If a new state is desired, the previous state gets a chance to clean itself up before the new state is marked as active and its enter function is called.
The states
So now let’s look at what the state nodes are actually doing. At the heart of every state is the State class. This class is never directly used, but having class_name at the top still makes it useful to us, as we’ll see in a bit. Be warned, though. If you’re not familiar with object oriented programming, how this is used is probably going to be a bit confusing to you.
class_name State
extends Node

@export
var animation_name: String
@export
var move_speed: float = 300

var gravity: int = ProjectSettings.get_setting("physics/2d/default_gravity")

# Hold a reference to the parent so that it can be controlled by the state
var parent: Player

func enter() -> void:
	parent.animations.play(animation_name)

func exit() -> void:
	pass

func process_input(event: InputEvent) -> State:
	return null

func process_frame(delta: float) -> State:
	return null

func process_physics(delta: float) -> State:
	return null
This class is the core interface behind our state interactions, so let’s break it down line-by-line.
class_name State
extends Node
class_name declares a class named State in the global namespace, which basically means we can bring all of the code here into other scripts without having to copy-paste anything or reference the exact location of this file, and it let’s us make use of Godot’s type system, giving benefits such as text completion, auto-filtering any exported variables to the given type, and so on. In our state machine node, for example, we reference this class so that Godot knows what kind of object we’re working with.
@export
var animation_name: String
@export
var move_speed: float = 300

var gravity: int = ProjectSettings.get_setting("physics/2d/default_gravity")
By exporting animation_name, we can easily tell our state to play an animation on the Player whenever that state takes over. Similarly, move_speed is exported so that all of our states can have movement, if desired. In the sample project, movement in the air is the same as on the ground, but you could modify this variable on each state to make it vary. Lastly, gravity is loaded from the global game settings so that we have a consistent value on every physics object.
# Hold a reference to the parent so that it can be controlled by the state
var parent: Player
We saw a reference to this variable in the state machine, and here’s where it lives. As the comment says, each state holds a reference to the player so that it can control it as if they were directly connected to one another.
func enter() -> void:
	parent.animations.play(animation_name)

func exit() -> void:
	pass

func process_input(event: InputEvent) -> State:
	return null

func process_frame(delta: float) -> State:
	return null

func process_physics(delta: float) -> State:
	return null
This is the meat of the State class, though it might not look like it since it’s fairly sparse. Here, a default implementation for each function that may get called by the state machine is declared, with the ones expected to return a state returning null by default, signalling to the state machine that a state transition should not occur.
One thing that may stand out to you is that I don’t use the built-in _process, _physics_process, or _unhandled_input / _input functions directly that come with Nodes, and the reason is really just a stylistic preference. I simply prefer to use a separate function I have direct and full control over. You can certainly use the built-in functions directly (along with a few calls in your enter and exit functions to toggle the processing of these functions on and off), but I just prefer to be a bit more explicit in what I’m doing. I guess this is a good time to remind you that options exist, there’s little in programming that should be taken as dogma, and over time you’ll figure out what you like and what works best for you :)
As we look at other states, you’ll notice that not every function here is shown. In those cases, that’s because we’re falling back on this default implementation, which typically does nothing, with the exception of the enter function, where we do, by default, play the animation associated with that state.
A few examples
From here, we just need to have an instance of this class for each state, along with the relevant logic. To create a state, we can add a Node as a child of our state machine and attach a script that extends our State class, meaning we can bring in everything we just looked at while also adding new functionality on top of it. To demonstrate this, let’s look at the code for the idle state:
extends State

@export
var fall_state: State
@export
var jump_state: State
@export
var move_state: State

func enter() -> void:
	super()
	parent.velocity.x = 0

func process_input(event: InputEvent) -> State:
	if Input.is_action_just_pressed('jump') and parent.is_on_floor():
		return jump_state
	if Input.is_action_just_pressed('move_left') or Input.is_action_just_pressed('move_right'):
		return move_state
	return null

func process_physics(delta: float) -> State:
	parent.velocity.y += gravity * delta
	parent.move_and_slide()

	if !parent.is_on_floor():
		return fall_state
	return null
Let’s break this down.
extends State

@export
var fall_state: State
@export
var jump_state: State
@export
var move_state: State
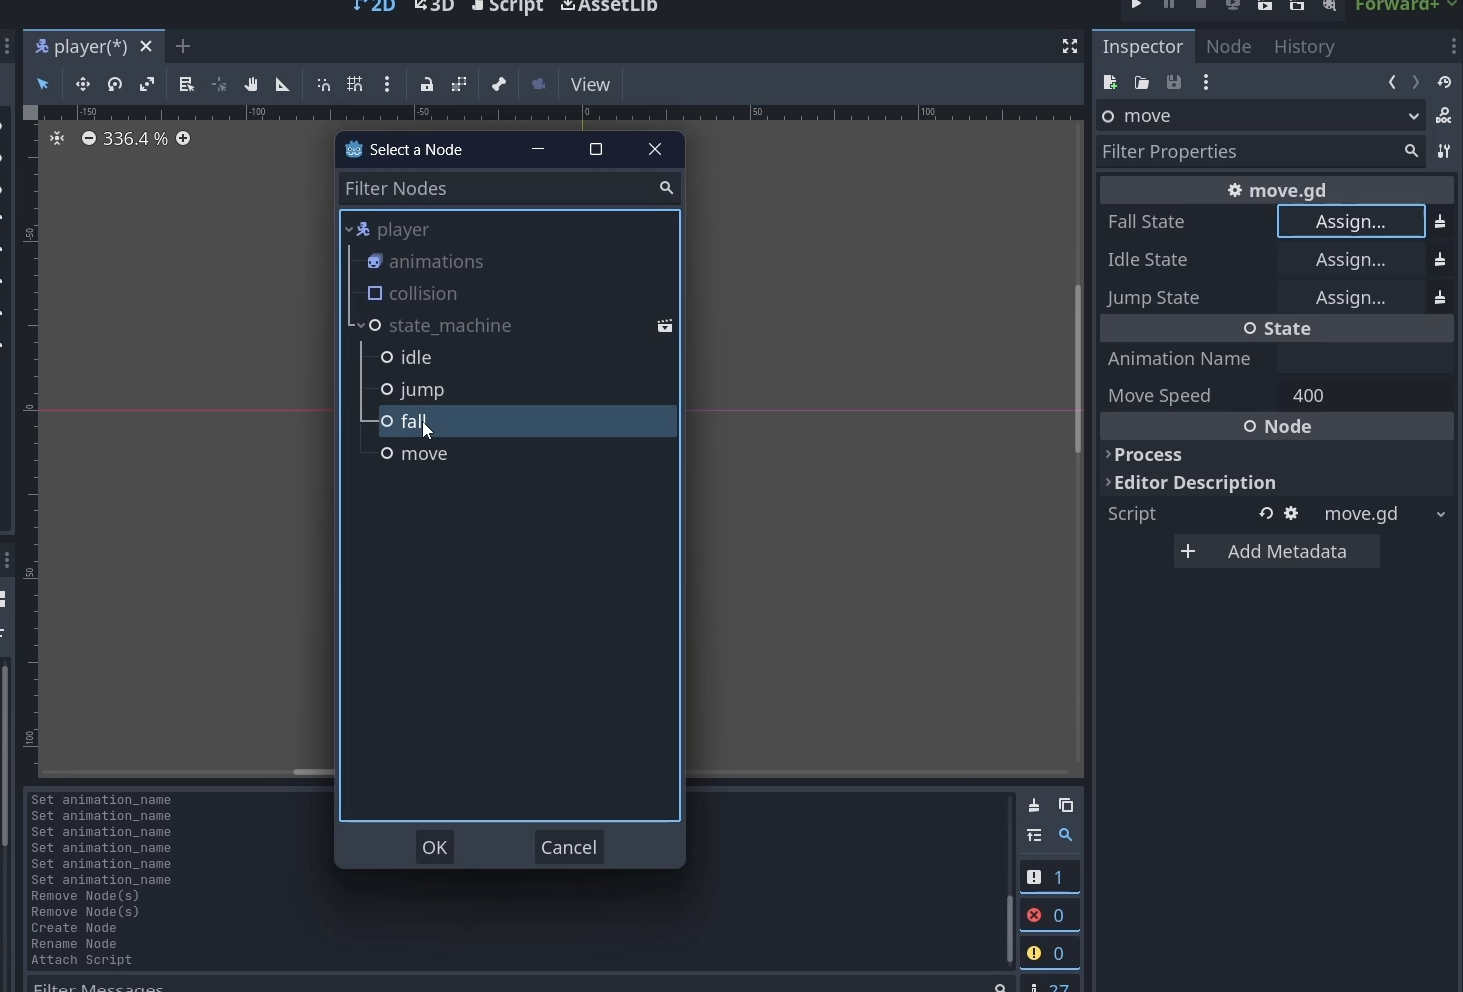
As mentioned above, extends State tells Godot that this script inherits the State class to bring in everything from it by default. We then have a few exports for the states we want to transition to. Since we’ve typed them as State nodes, the Godot editor will automatically filter our options for us.
func enter() -> void:
	super()
	parent.velocity.x = 0
Here’s where some of the magic starts coming into play. The call to super() means that we will call the enter() function as defined in our top-level State class, which, as a quick refresher, is defined as:
func enter() -> void:
	parent.animations.play(animation_name)
So by calling super(), we can set our animation when we enter the state and still run any custom enter logic we want, which in this case is used to zero out the player’s horizontal velocity.
Next up, let’s look at the process_input function, which is looking for the player to either press the “jump” button while on the floor, which will send the character to the jump state, or one of the movement keys, which will send them to the movement state.
func process_input(event: InputEvent) -> State:
	if Input.is_action_just_pressed('jump') and parent.is_on_floor():
		return jump_state
	if Input.is_action_just_pressed('move_left') or Input.is_action_just_pressed('move_right'):
		return move_state
	return null
And lastly we have the process_physics function, which applies gravity and moves the player appropriately (just in case they stop on a slope of something like that) and switches to the fall state in case something happens while idle and the player is no longer standing on anything.
func process_physics(delta: float) -> State:
	parent.velocity.y += gravity * delta
	parent.move_and_slide()

	if !parent.is_on_floor():
		return fall_state
	return null
And that’s it for the idle state. To help drive things home, let’s look also look at the jump state, which is similar in many ways, but does have a bit more going on:
# jump.gd
extends State

@export
var fall_state: State
@export
var idle_state: State
@export
var move_state: State

@export
var jump_force: float = 700.0

func enter() -> void:
	super()
	parent.velocity.y = -jump_force

func process_physics(delta: float) -> State:
	parent.velocity.y += gravity * delta

	if parent.velocity.y > 0:
		return fall_state

	var movement = Input.get_axis('move_left', 'move_right') * move_speed

	if movement != 0:
		parent.animations.flip_h = movement < 0
	parent.velocity.x = movement
	parent.move_and_slide()

	if parent.is_on_floor():
		if movement != 0:
			return move_state
		return idle_state

	return null
Breaking it down again:
extends State

@export
var fall_state: State
@export
var idle_state: State
@export
var move_state: State

@export
var jump_force: float = 700.0
This is largely the same as what was in the idle state. We state that we’re inheriting from the State class, export the states we’ll transition to, but now also export a new state-specific variable, jump_force, to configure hard to jump upwards when the player jumps.
func enter() -> void:
	super()
	parent.velocity.y = -jump_force
When the state is entered, we let the parent implementation go first, setting the appropriate animation, and then set the player’s vertical velocity to the jump_force we’ve defined, just flipped since y values decrease as you move upward in Godot. Why not just make the jump_force negative from the start? Again, this is a bit of stylistic thing since I just prefer to define a force that will act on something in the positive and then orient it correctly when needed.
func process_physics(delta: float) -> State:
	parent.velocity.y += gravity * delta

	if parent.velocity.y > 0:
		return fall_state

	var movement = Input.get_axis('move_left', 'move_right') * move_speed

	if movement != 0:
		parent.animations.flip_h = movement < 0
	parent.velocity.x = movement
	parent.move_and_slide()

	if parent.is_on_floor():
		if movement != 0:
			return move_state
		return idle_state

	return null
During the physics update, we let gravity work its magic and switch to the fall state if the player is no longer moving upward. Otherwise, we read in the user’s input to let the player move around in the air as desired, update the physics body with move_and_slide, and then check if we’re on the floor. If so, transition to a move or idle state, depending on if any keys are currently pressed. If not, we’ll return null and keep the jump state active for another frame.
And that’s it for the jump state, and states in general, for this implementation. I’ll save you the tedium of going through all the others just to see more or less the same thing over and over, but if you look at the other states in the sample project, you’ll see a similar pattern of overriding the functions we care about, ignoring the ones we don’t, and responding to inputs or events where appropriate.
With what we currently have, you can easily set up a simple character controller to use in your game and flesh it out as appropriate, but that’s about all you can do right now. In the next post, I’ll show you some techniques for building a more advanced state machine that’s capable of a lot more than what we’ve seen here.