5 more changes to GDScript in Godot 4 you’ll want to know about
Here’s another grab bag overview of some changes to GDScript 2 that you may want to know about. And in case you missed it, you can find part 1 here
Signal updates
Signals are still declared the same way as before (signal my_signal or signal my_other_signal(param1, param2)) but with the addition of Callables to Godot 4, how you connect to them via code is now different. Previously, you’d use a syntax like:
button.connect('pressed', self, '_on_button_pressed')
Now, you can reference the signal directly, call connect on it, and simply pass it the callable you want to connect:
button.pressed.connect(_on_button_pressed)

func _on_button_pressed():
    print('You pressed the button!')
But if you need to make dynamic connections at runtime, you can still use strings to dynamically make connections:
button.connect('pressed', _on_button_pressed)
button.connect('pressed', Callable(self, '_on_button_pressed'))
button.pressed.connect(Callable(self, '_on_button_pressed'))
The other thing you may be curious about is how to pass additional parameters to your signal connections beyond what the signal itself will emit. Say we want multiple buttons to connect to the same signal, but should pass along which button was pressed. In Godot 3, we’d just add all parameters to an array at the end of the call to connect:
button1.connect('pressed', self, '_on_button_pressed', [button1])
button2.connect('pressed', self, '_on_button_pressed', [button2])

func _on_button_pressed(button: Button) -> void:
    print('Pressed %s' % button.name)
In Godot 4, we instead bind our parameters to the desired callable, which gives us the same result as before in that any bound parameters will be added after parameters supplied by the connection:
button1.pressed.connect(_on_button_pressed.bind(button1))
button2.pressed.connect(_on_button_pressed.bind(button2))

func _on_button_pressed(button: Button) -> void:
    print('Pressed %s' % button.name)
Alternatively, you can call bindv if you prefer to pass an array of values:
button1.pressed.connect(_on_button_pressed.bindv([button1, 'button1 was pressed!']))

func _on_button_pressed(button: Button, msg: String) -> void:
    print('%s says: %s' % [button.name, msg])
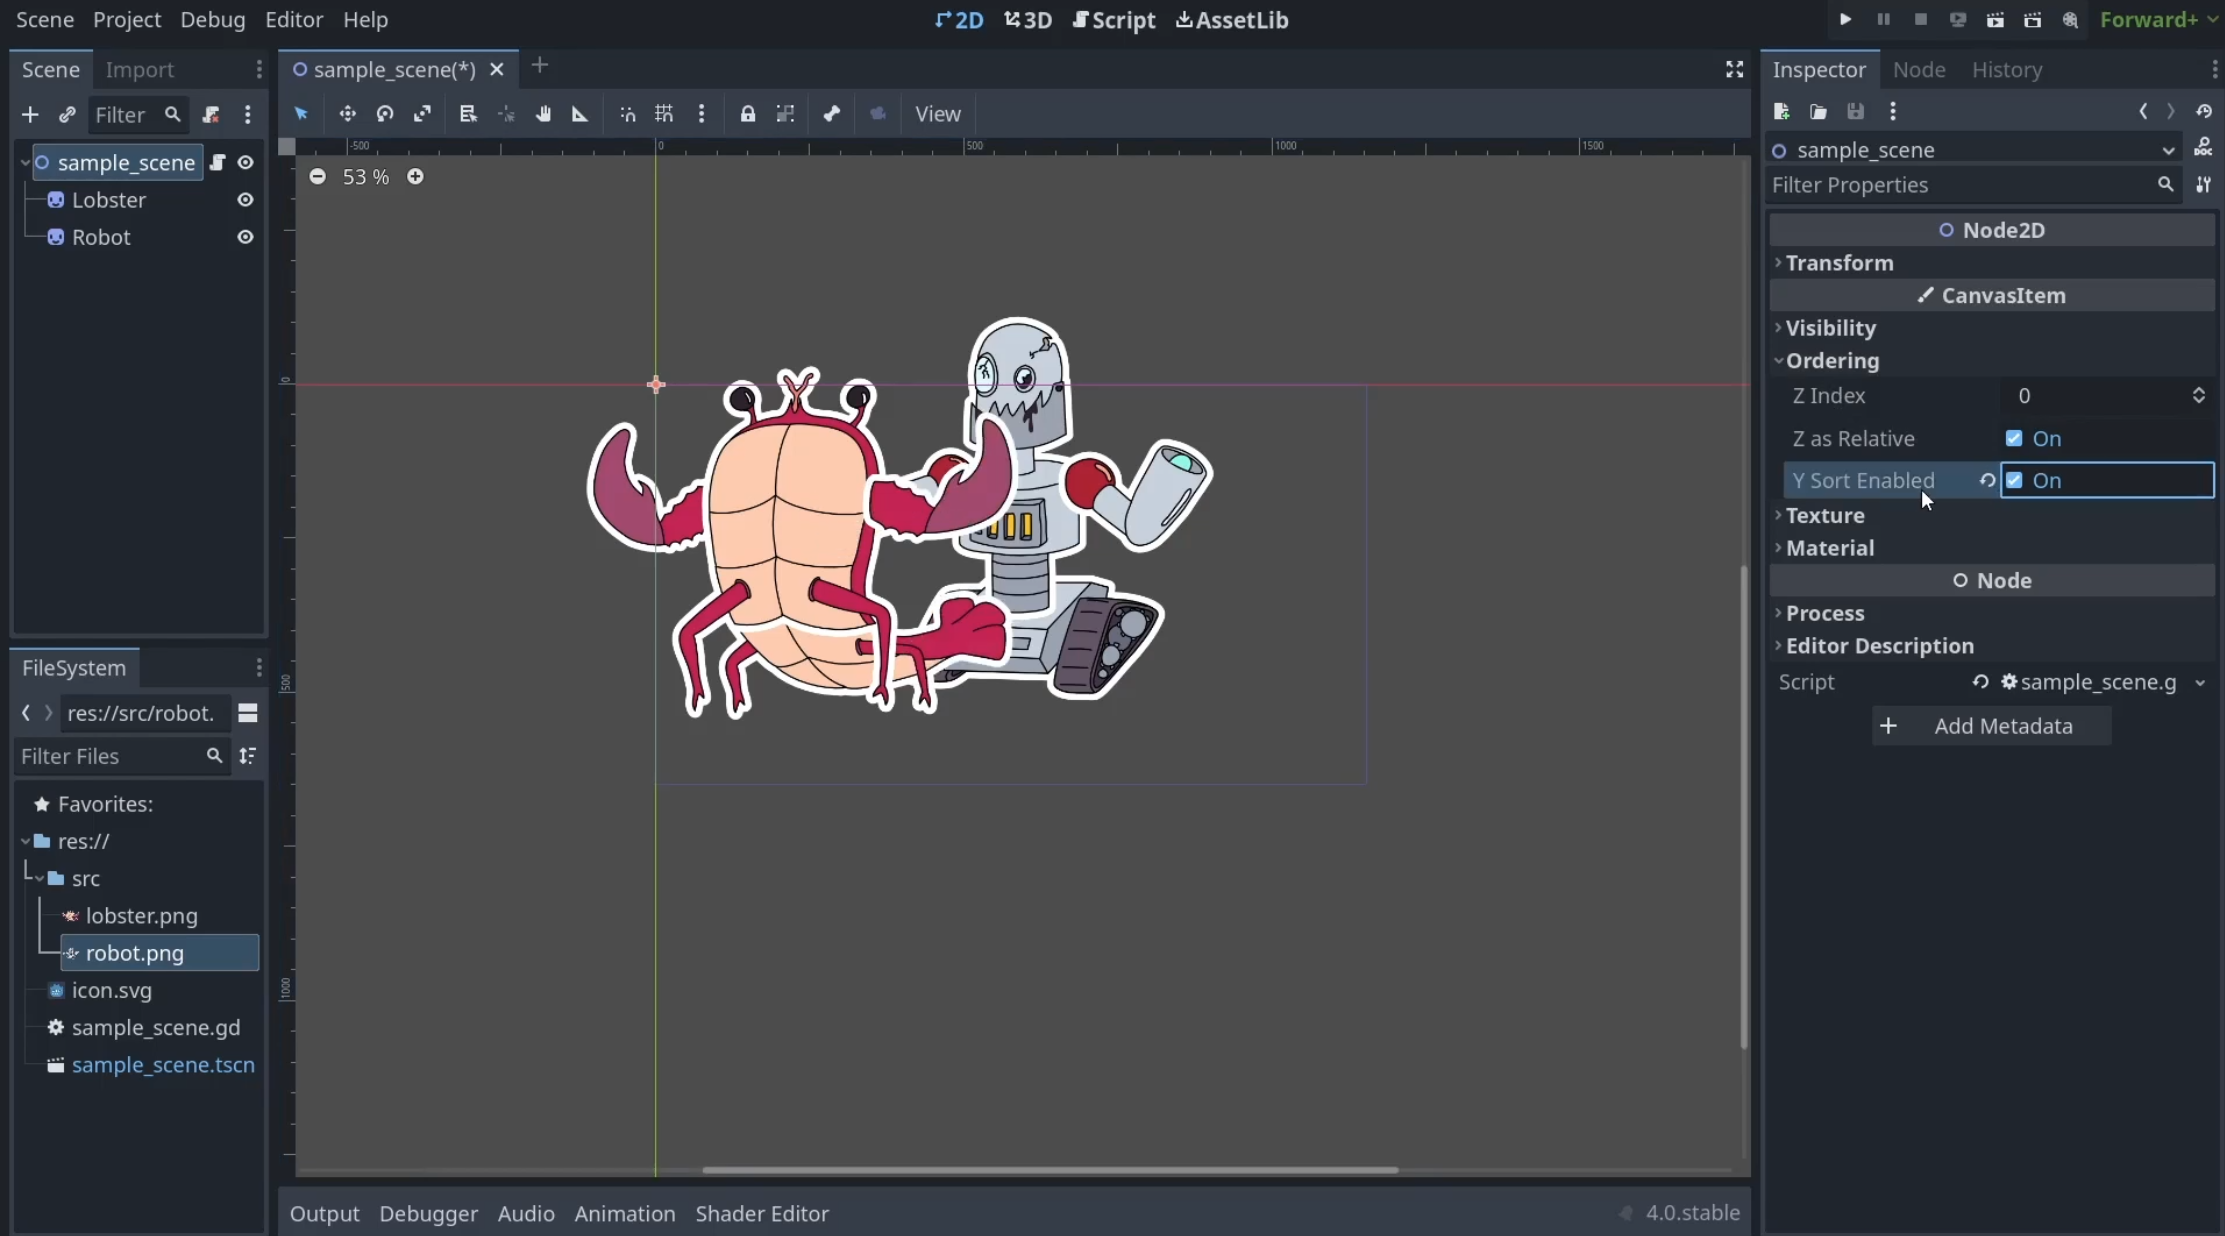
YSort
This is a really small, but convenient, change. The YSort node is gone from Godot 4, and has instead been rolled into the CanvasItem class, which both Control and Node2D inherit from, meaning you can now take any 2D object and enable y-sorting for its children without having to change its type to a YSort node or add such a node somewhere in your hierarchy. Just toggle YSort under CanvasItem > Ordering in the editor, or change the y_sort_enabled property via code.
Documentation comments
A syntax for documentation comments has also been added to GDScript 2, letting you automatically generate and view documentation for your application from within the editor. To write them, you just use a double hash (##) instead of a single hash, but there’s also some extra formatting help built-in.
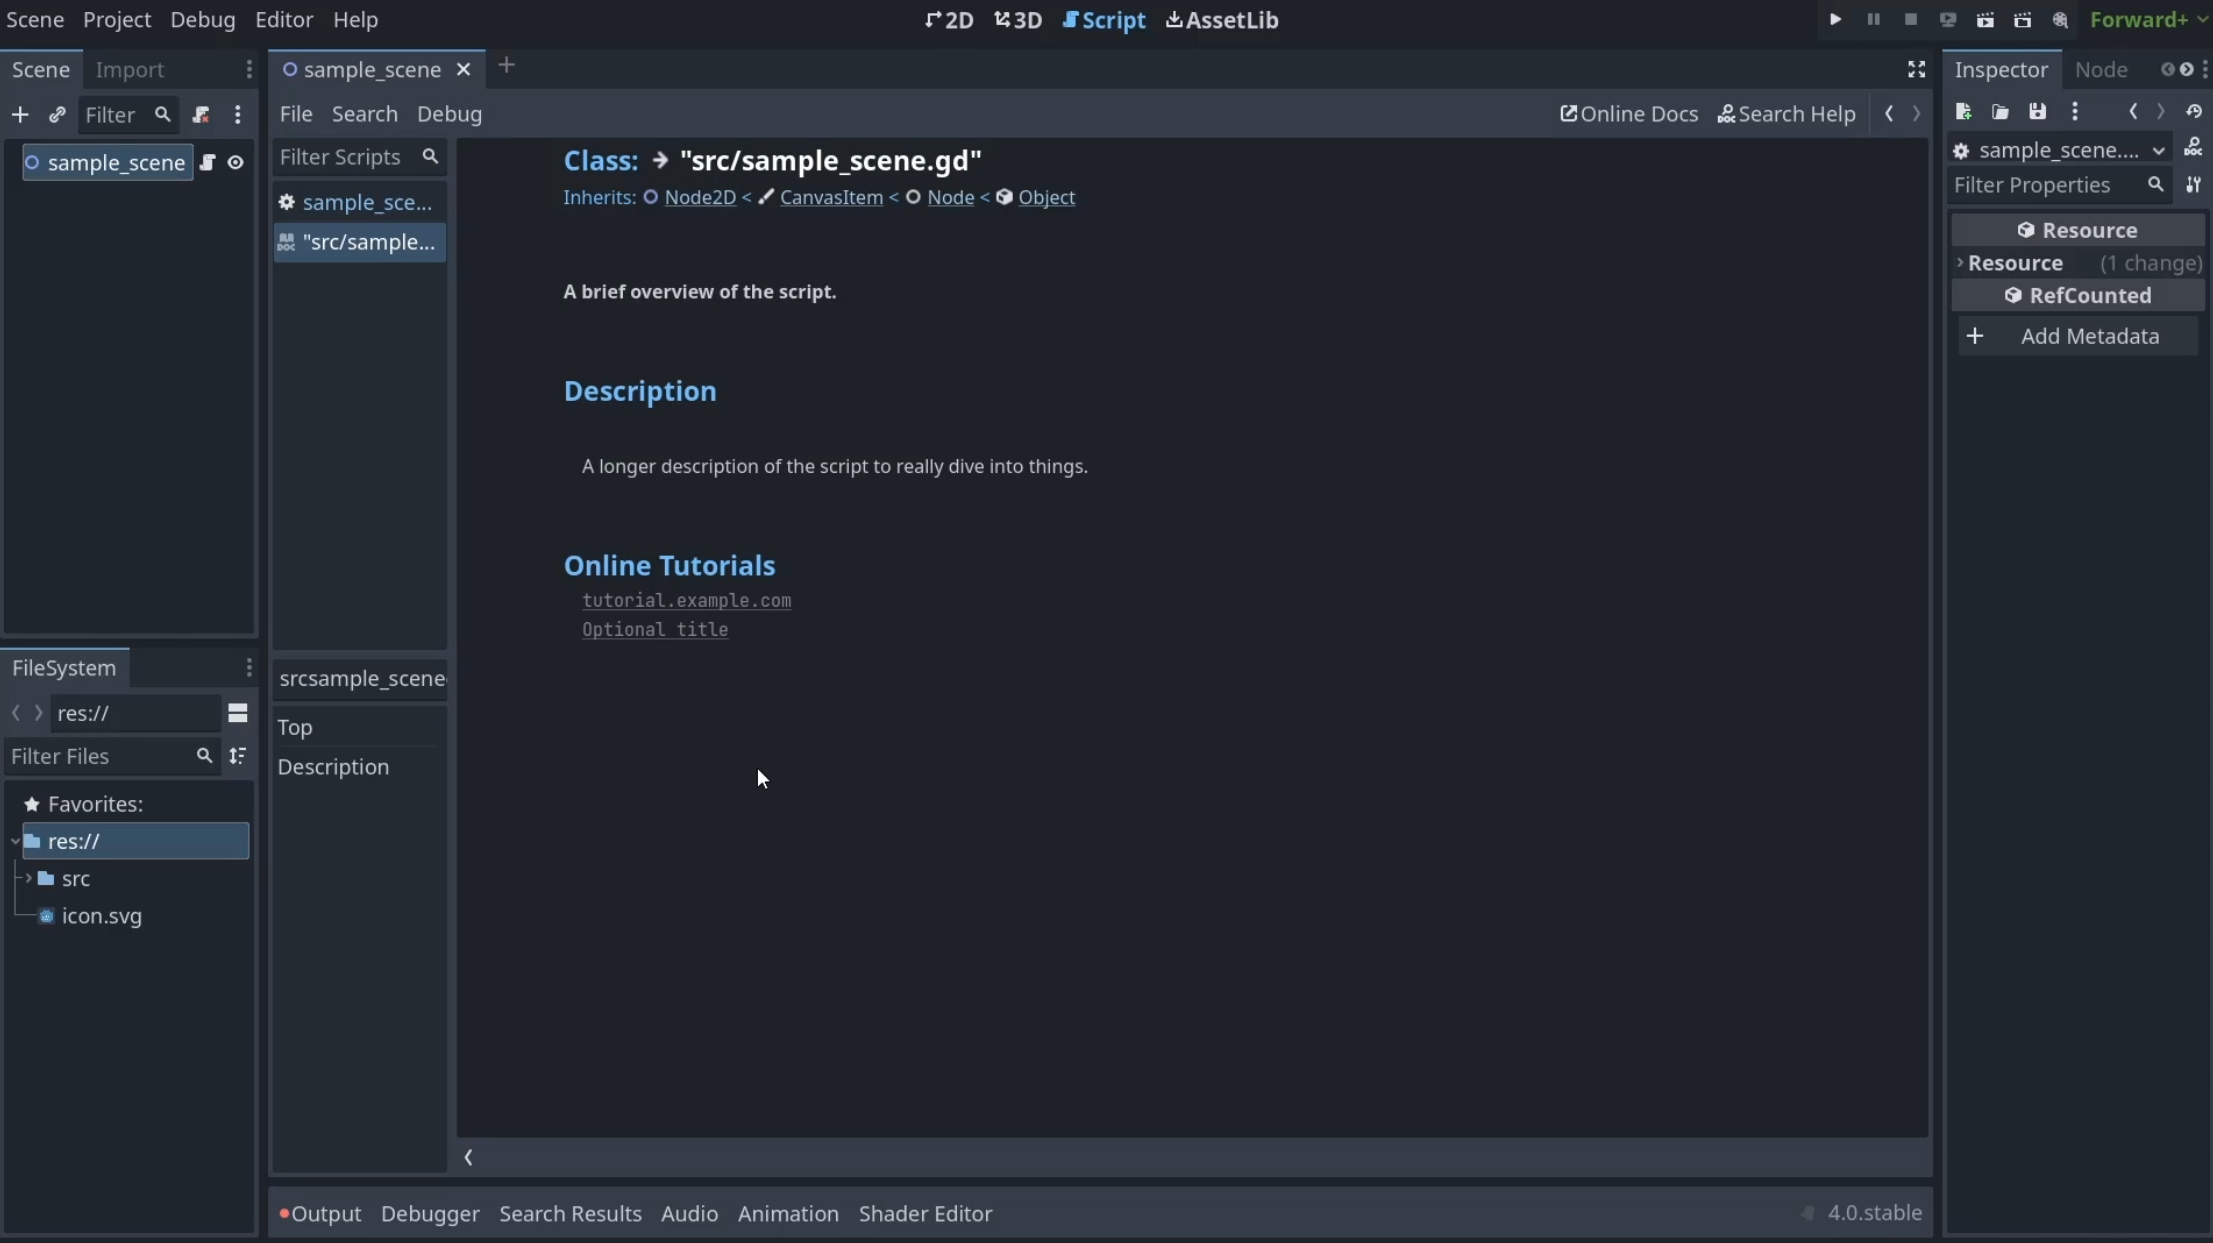
Want to write a high-level summary of a script? Throw a documentation comment at the very top of your script in the following syntax:
extends Node2D

## A brief description
##
## A longer description.
##
## @tutorial: tutorial.example.com
## @tutorial(Optional Title: tutorial.example.com
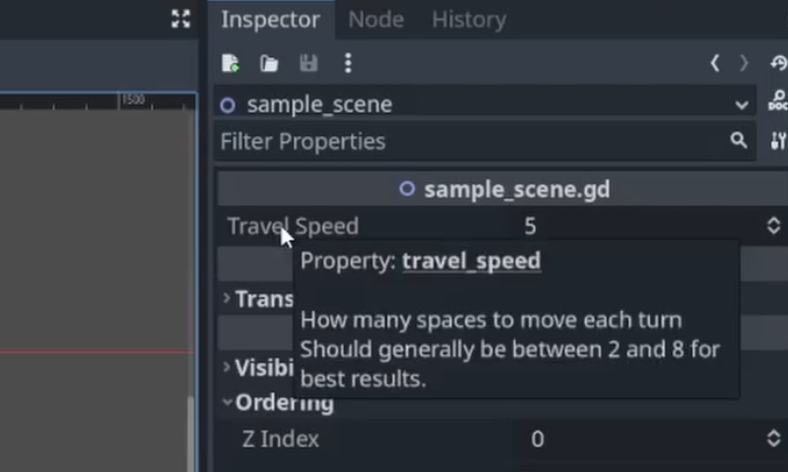
You can also use documentation comments for script members by putting them immediately before their declaration. In addition to showing up in the documentation page, these will also show up elsewhere in the application, where applicable, such as when exporting a variable.
extends Node2D

## A brief description
##
## A longer description.
##
## @tutorial: tutorial.example.com
## @tutorial(Optional Title): tutorial.example.com

## How many spaces to move each turn.
## Should generally be between 2 and 8 for best results.
@export
var travel_speed: int = 5

## The base build of the unit
enum BuildType {
    Warrior,    ## Slow but strong
    Archer,     ## Ranged specialist
    Thief       ## Fast but weak
}
You’re also not stuck with plain text, as BBCode is supported:
## Some [color=red][i]BBCode[/i][/color] [b]fun[/b].
## [br]
## A link to the enum [enum BuildType]
## [codeblock]
## var example = 1
## func do_something():
##     print('We can even have code blocks!')
## [/codeblock]
func some_fun_documentation():
	pass

Tween Rewrite
Tweens have received a rewrite in Godot 4, and Godot 3 users are in luck as this feature has been backported via the SceneTreeTween class.
Rather than the previous requirement of using the Tween node, Tweens are now simple RefCounted instances handled by the scene tree, making them more lightweight and available anywhere in the application. Just create a tween by calling create_tween() from either the scene tree (typically by using get_tree().create_tween()) or from a Node (some_node.create_tween() or just create_tween() if you want to create it on the node running the script) if you want to bind the tween to that node, and then tween your properties.
extends Sprite

# Turn red over the span of one second
func turn_red():
    var tween = create_tween()
    tween.tween_property(self, 'modulate', Color.RED, 1.0)
The new tween system also supports sequential tweens by default, making it easier to build up a more complex sequence of animations, though you can also run tweens in parallel if you want.
extends Sprite

# Flash red two times over two seconds
func flash_red():
    var tween = get_tree().create_tween()
    # Each tween will wait for the previous to complete
    tween.tween_property(self, 'modulate', Color.RED, 0.5)
    tween.tween_property(self, 'modulate', Color.WHITE, 0.5)
    tween.tween_property(self, 'modulate', Color.RED, 0.5)
    tween.tween_property(self, 'modulate', Color.WHITE, 0.5)

# Fade the sprite to transparent and shrink it at the same time
func fade_and_shrink():
    var tween = get_tree().create_tween()
    tween.tween_property(self, 'modulate', Color.TRANSPARENT, 0.5)
    tween.parallel().tween_property(self, 'scale', Vector2.ZERO, 0.5)
It’s also possible to invoke custom methods, put delays between tweens, change the easing settings, and so on, but since this is just a high-level preview, I’ll link you to the docs to learn more.
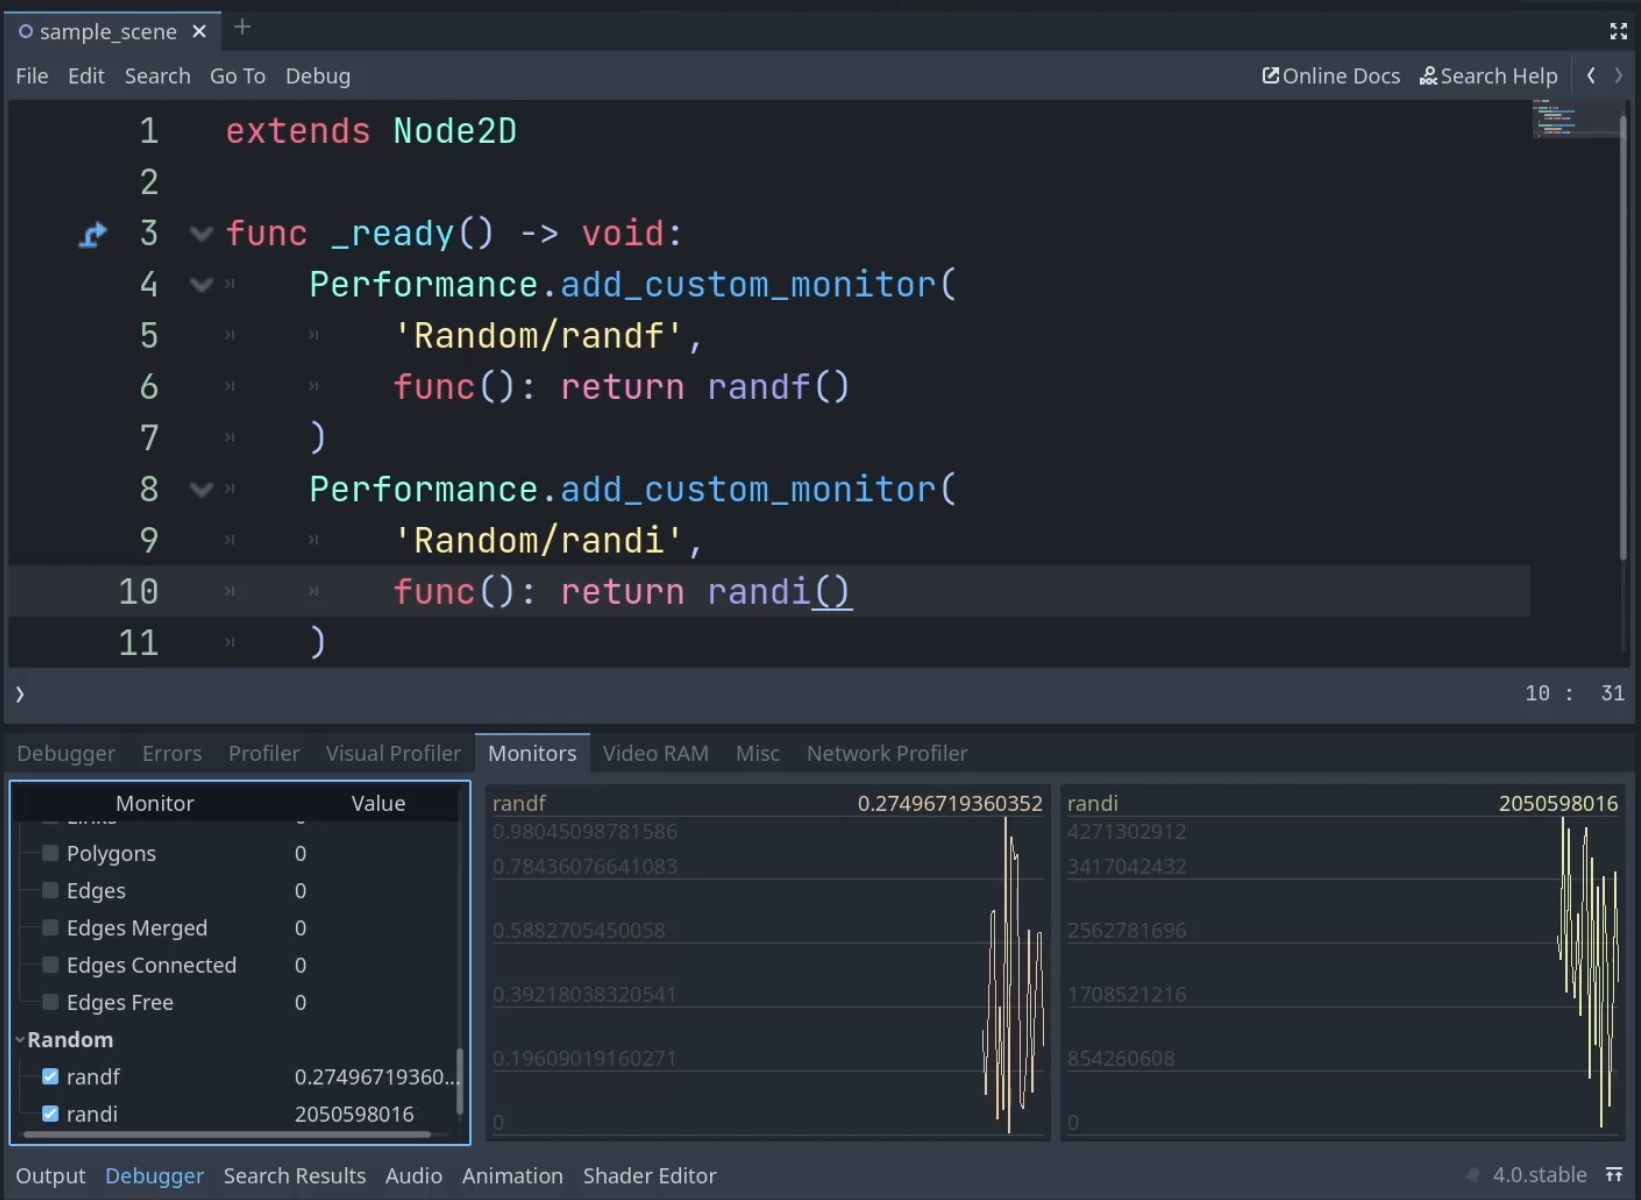
Custom performance monitors
Custom performance monitors can now be easily added to your game via the Performance singleton by calling Performance.add_custom_monitor and giving your custom metric a name and a Callable that will return a number greater than or equal to zero. You can also put a slash in the name to group metrics together under useful categories. Use this to track performance, debugging, or other metrics of interest to you.
func _ready() -> void:
    Performance.add_custom_monitor('example/randf', get_random_float)
    # An example of passing parameters to the Callable
    Performance.add_custom_monitor('example/randf_small', get_random_float, [0.0, 10.0])

func get_random_float(min = 0.0, max = 100.0) -> float:
    return randf_range(min, max)
Migrating from 3 to 4
And that’s a few more changes to Godot and GDScript to be aware of, but there’s a lot more that’s changed, especially if you’re looking to port an existing Godot 3 project (the list of renamed features alone is pretty long), so check out the handy page in the docs for more info about migrating projects.