Ten small ways to make your life easier in GDScript
Just a quick one today, as I’m currently working on some bigger posts that need some more time in the oven.
Here’s a few quick ways to make your life a little bit easier when writing GDScript.
Making outputs more useful
First up, let’s talk about the terminal. On its own, the print command can be a little barebones, as there’s no styling or even spacing between multiple output arguments, but there are a number of built-in options for improving your text-based adventures. For instance, using the command prints rather than print will automatically space your arguments apart in the terminal.
# Output: 123
print(1, 2, 3)

# Output: 1 2 3
prints(1, 2, 3)
But if you need a bit more style, you can use print_rich to incorporate a subset of BBCode tags into your output:
print_rich('[b]Bold[/b] and [color=red]Colorful[/color]')
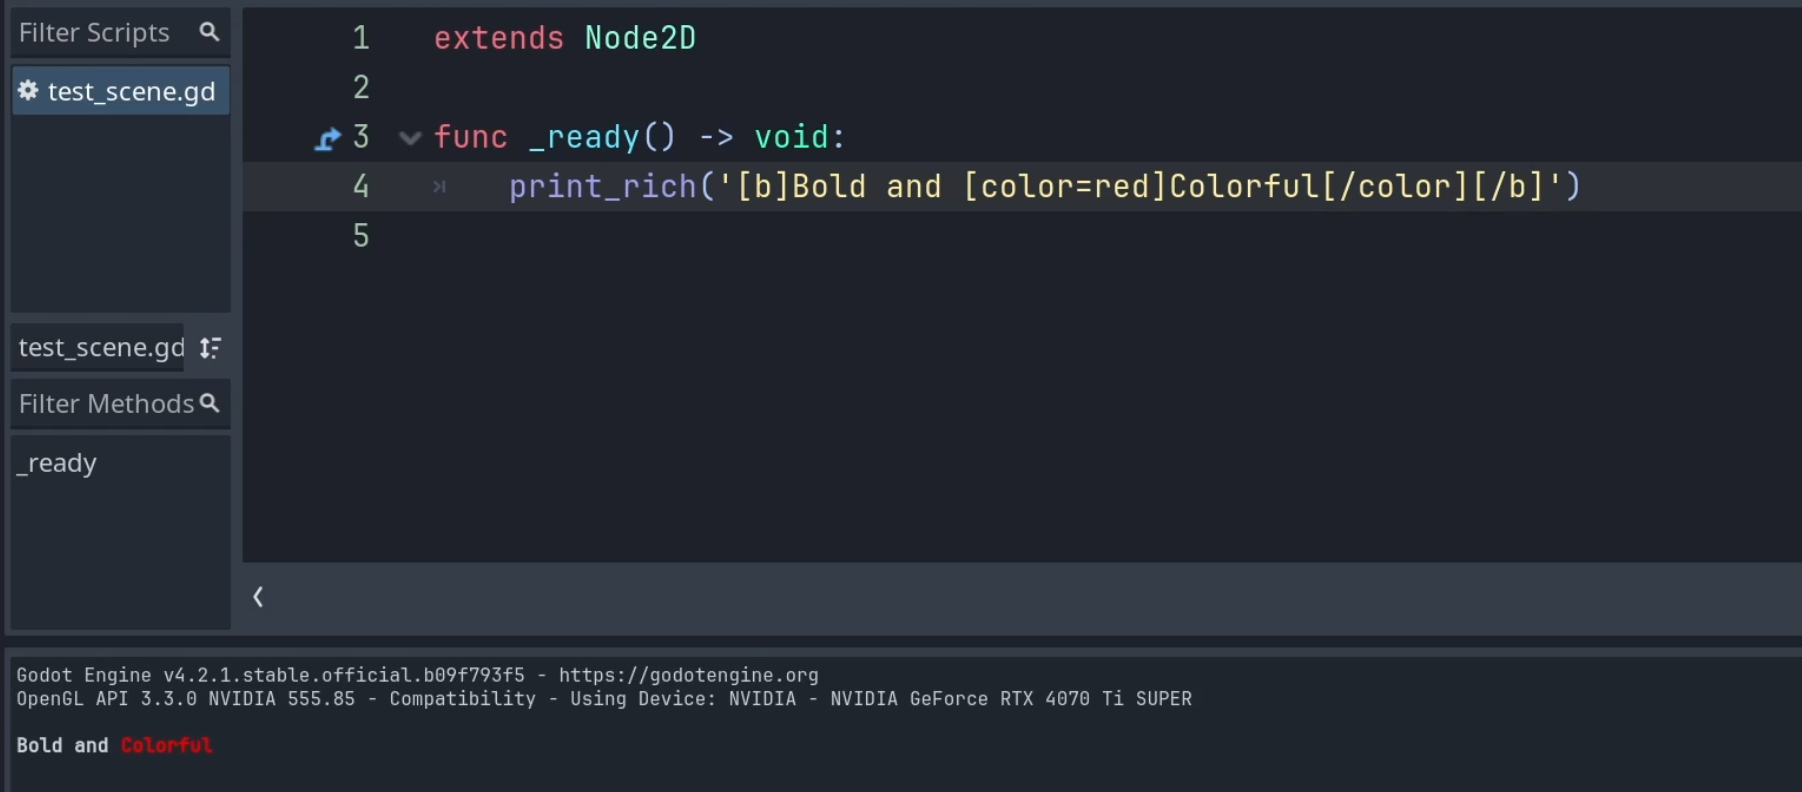
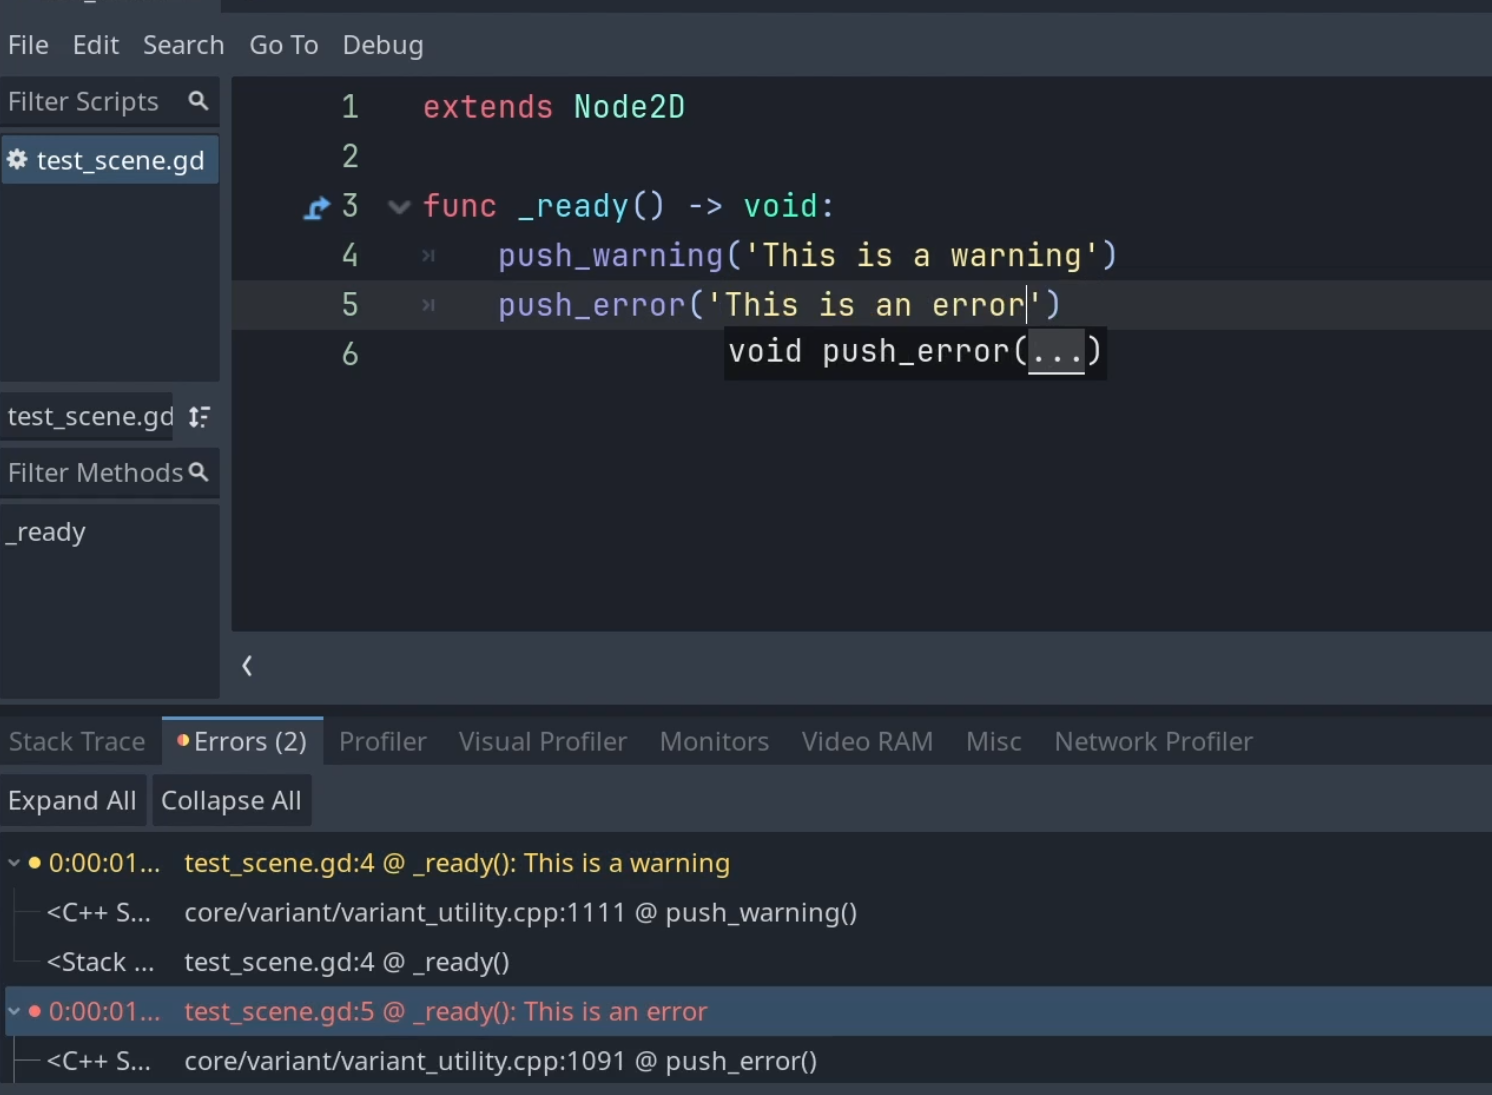
Note that platform support does vary, so while you may sometimes find this useful, or even just fun, if you’re trying to monitor what’s happening in your application, you may find push_warning and push_error to be more useful. As the names imply, these functions let you add your own custom warnings and errors to Godot’s built-in debugger and see exactly where that call was made, making them a great choice for doing things like monitoring if a value goes out of the expected range or if an expected bit of data is missing.
func _ready() -> void:
    push_warning('This is a warning')
    push_error('This is an error')
Organizing your code
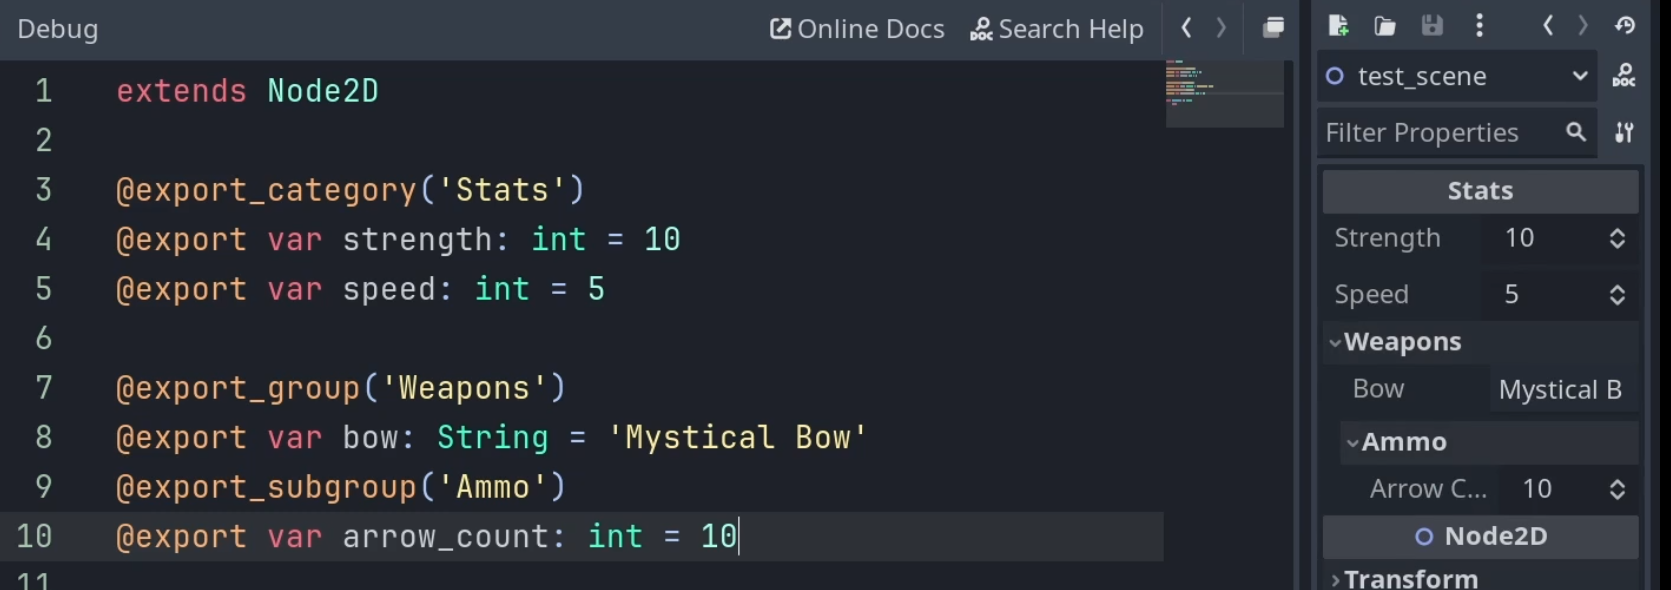
Next up, let’s talk about a few quick and simple ways you can make your code easier to work with. As you probably know, exported properties are a pretty big deal in Godot, but rather than just dump all of your variables into one long list via simple @export annotations, you can organize your exports into logical partitions. @export_category can be placed above exports to put those that follow under the same banner, while @export_group and @export_subgroup let you make collapsible groups of exports.
@export_category('Stats')
@export var strength: int = 10
@export var speed: int = 5

@export_group('Weapons')
@export var bow: String = 'Mystical Bow'
@export_subgroup('Ammo')
@export var arrow_count: int = 10
Furthermore, you can add helpful documentation to your exports by using documentation comments. While documentation comments can be useful in general for helping you to auto-generate documentation, if you place them immediately above an exported property, that comment will also be available in the inspector when you hover over it. Furthermore, some basic BBCode is supported, letting you customize how the information is presented.
## This is a [b]documentation comment[/b]
@export var what_is_this: bool = false

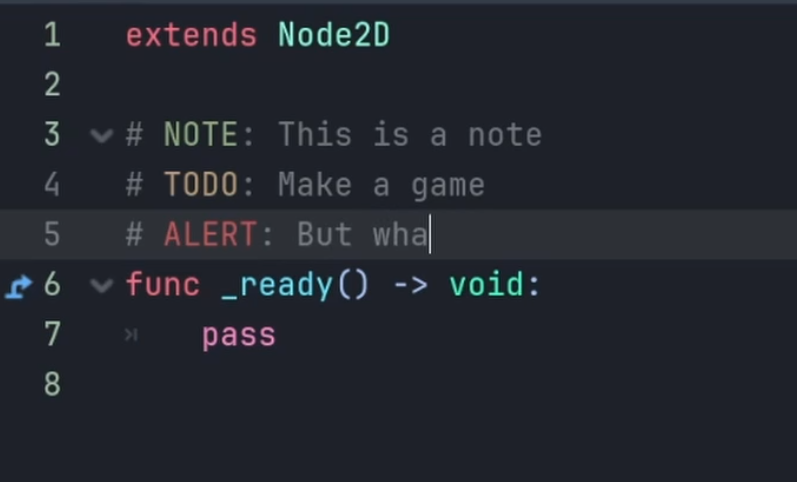
While we’re talking about comment formatting, there are additional small helpers to break up the monotony of gray text. For instance, there are special keywords that will automatically have a color applied to them in the built-in code editor, and these colors are configurable in the Editor Settings.
Or maybe you prefer to collapse code you don’t currently need and the default collapse options aren’t enough. With code regions, you can create your own custom blocks of code that can be collapsed, regardless of what’s in them. These can be manually placed by using the #region and #endregion keywords, or by selecting a group of text, right clicking it, and creating a region.
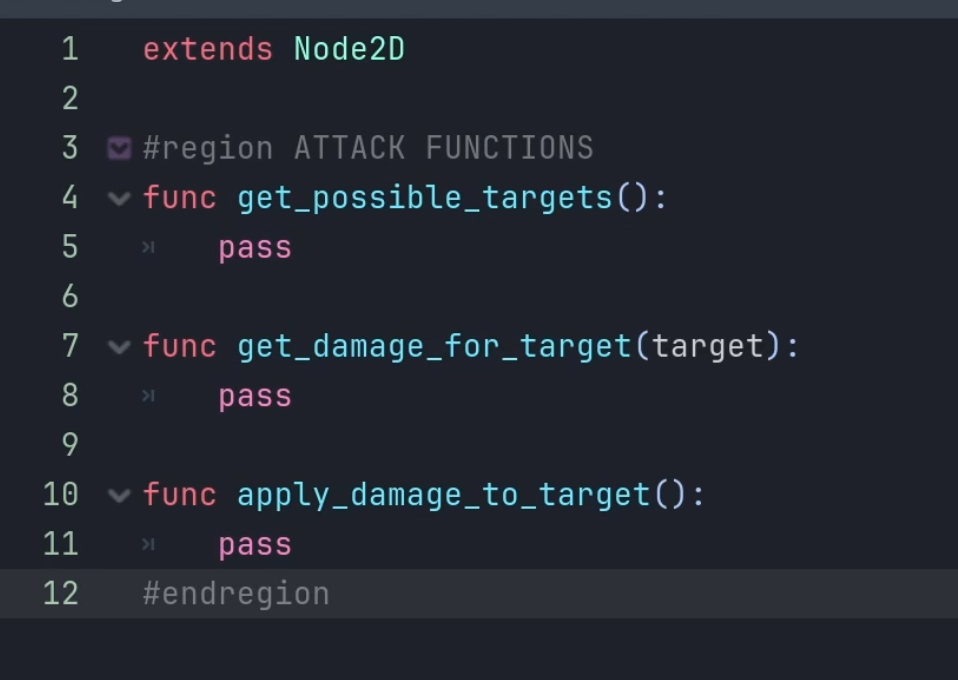
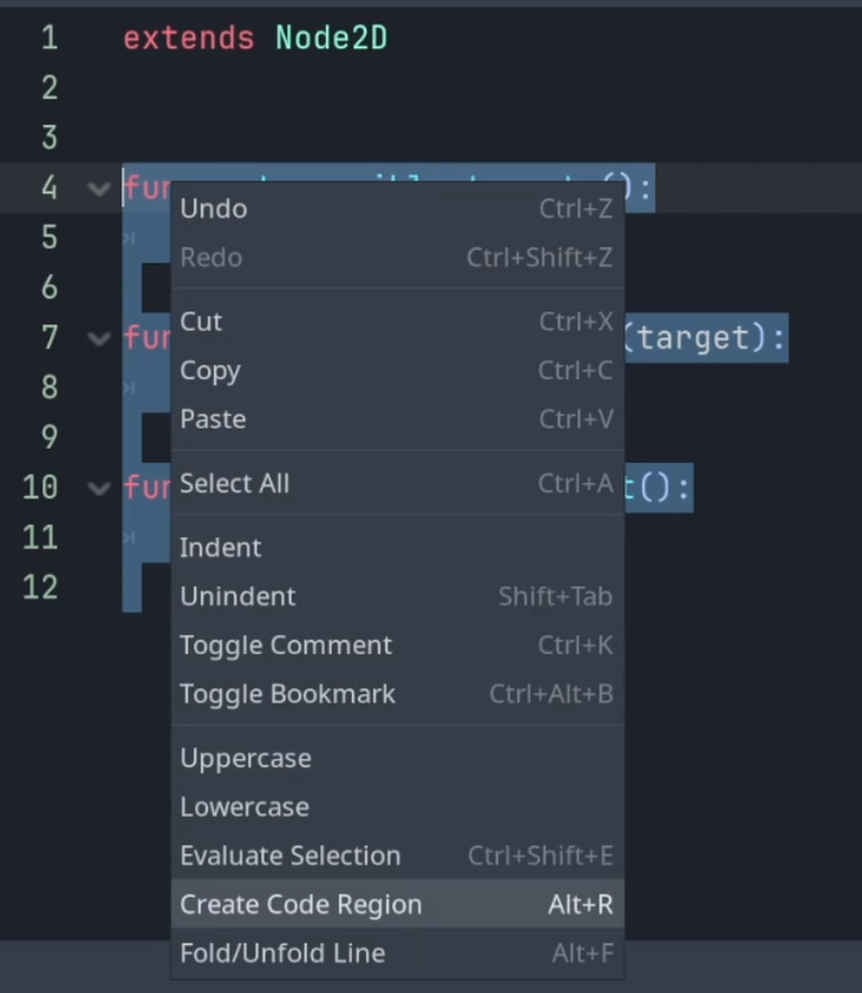
Be aware that this is a Godot editor exclusive, however, so if you like to use an external editor from time to time, this won’t help you there.
Handy shortcuts
Lastly, here’s a few small shortcuts I like to use that you might find handy as well. Firstly, if you’ve ever got a class you want to know more about, you can Ctrl+Click on it to immediately open the help docs for that class right in the editor. This same technique also works on your own variables or functions to immediately hop to where they’ve been defined, assuming it’s either in the same script or you’ve got your variables typed correctly so that Godot knows what you’re looking for.
Similarly, if you want to make an onready variable without having to type things out by hand, you can CTRL+Drag it into your code from the inspector and have the declaration written for you.
Lastly, this is more of a code shortcut than an editor shortcut, but I use it often enough that I think it’s worth mentioning. When dealing with dictionaries, where you may not always have the exact data you expect, rather than either risking trying to read a key that doesn’t exist and throwing an error, or checking for the key before reading from it, you can use the get method to return the value for that entry, if it exists, or return a default value of your choosing if not.
# Both techniques will print:
# 10
# -1

var status_effects = { 'speed': -1 }

# Overly verbose
if status_effects.has('speed'):
    print(status_effects.speed)
else:
    print(0)

if status_effects.has('strength'):
    print(status_effects.strength)
else:
    print(0)

# Concise
print(status_effects.get('speed', 0))
print(status_effects.get('strength', 0))
And that’s a few small ways to improve your workflows in GDScript, but there’s plenty that I’ve not mentioned here so feel free to share your own in the comments. Thanks for reading.